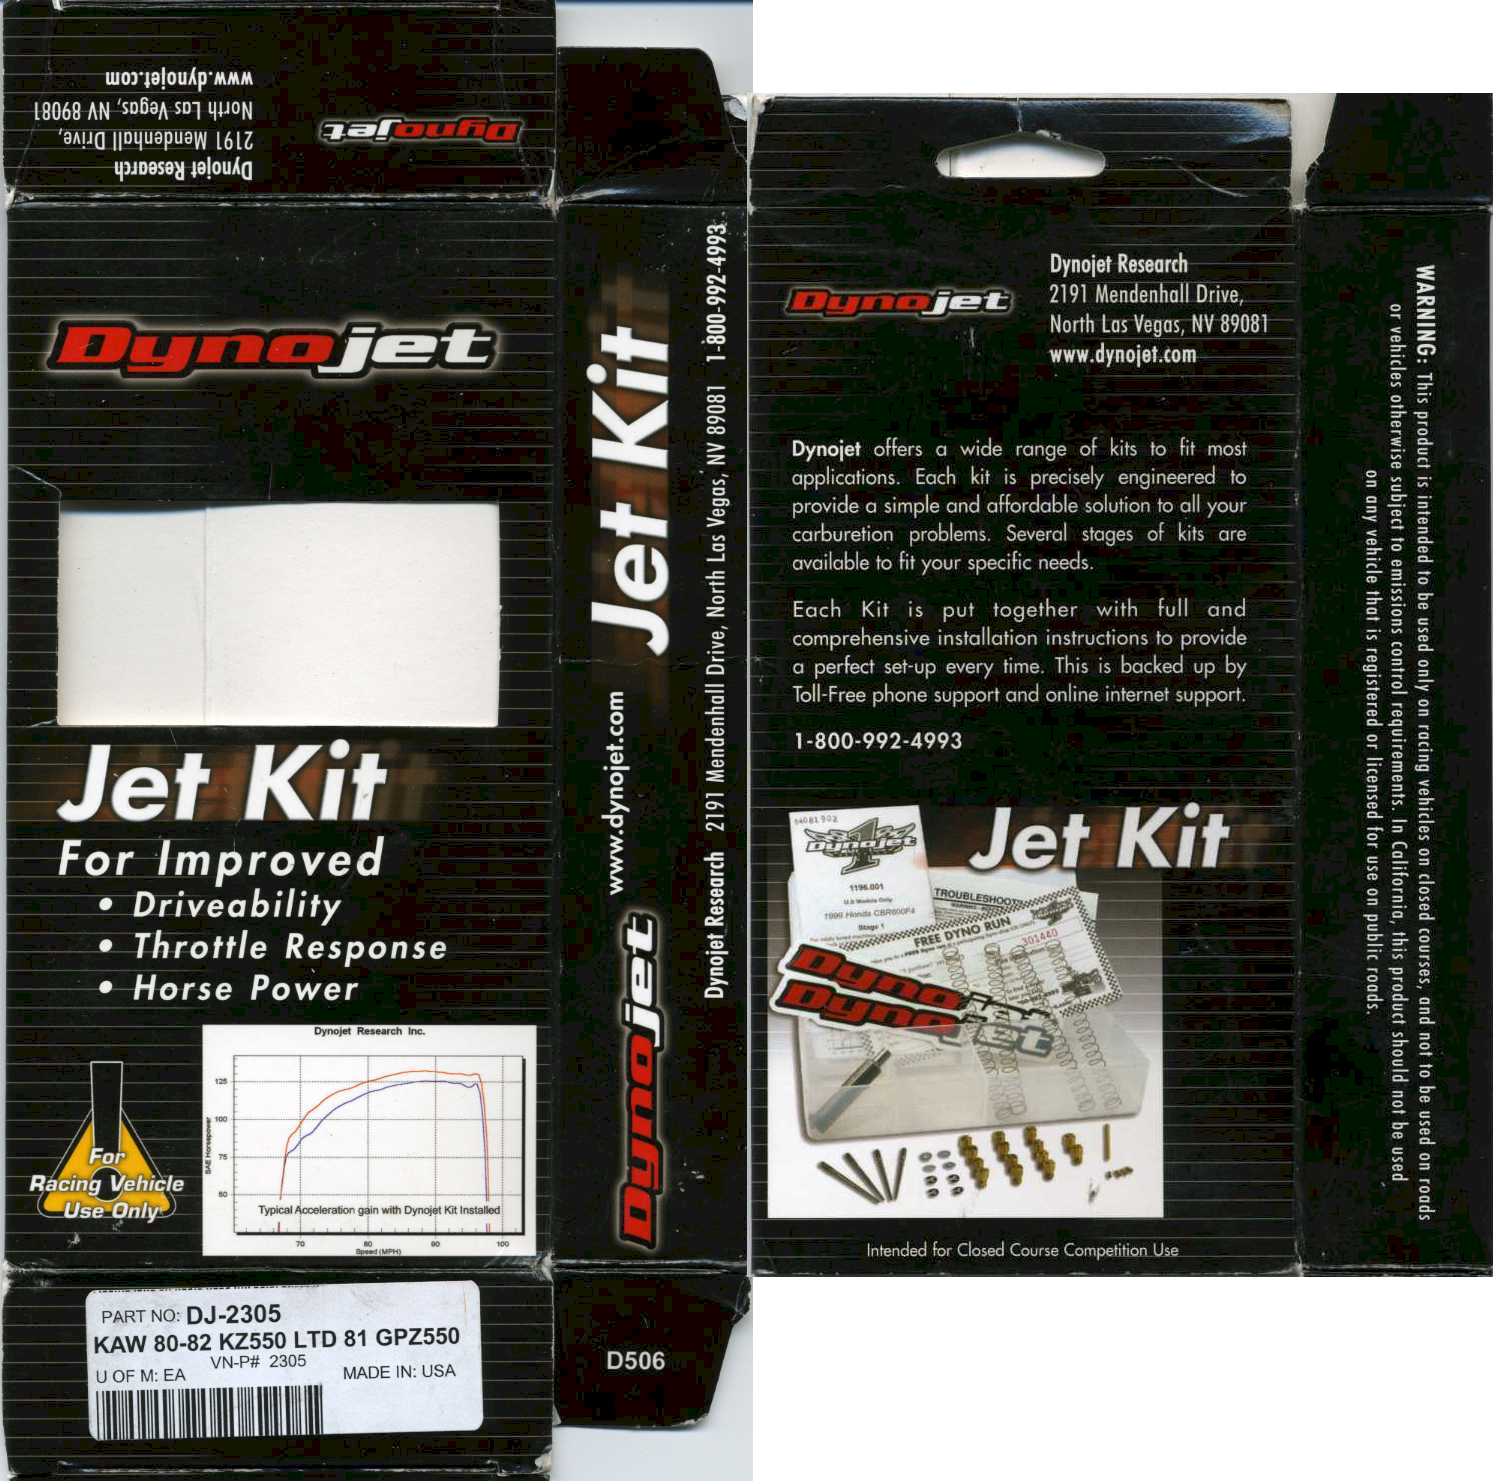
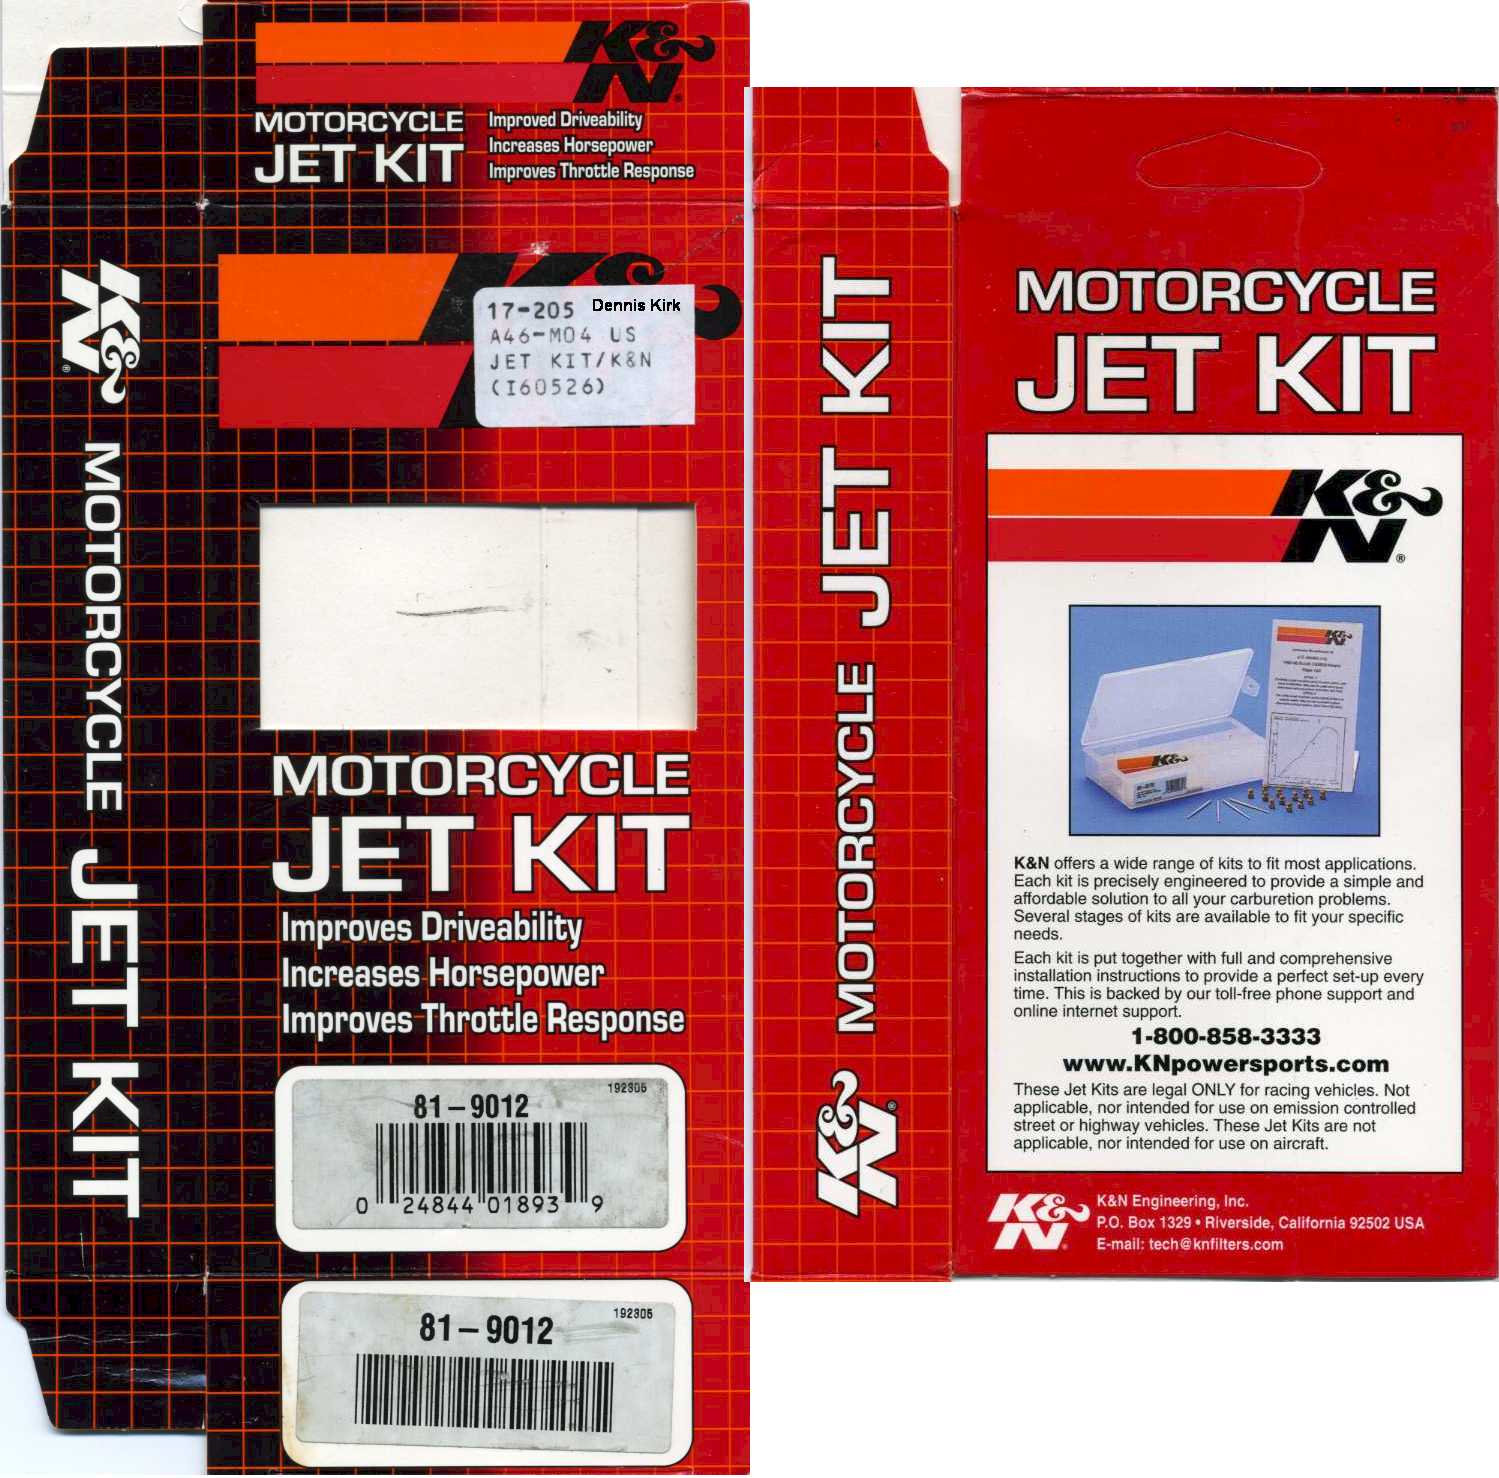
The same kit is also available under the K & N brand. It is K & N kit 81-9012.
The kit includes new main jets in sizes 98, 102, 108, and 112, in addition to DNO205 needles (which have longer tapers than stock).
Here is the fact sheet listing the components in the kit. (click on it to enlarge)
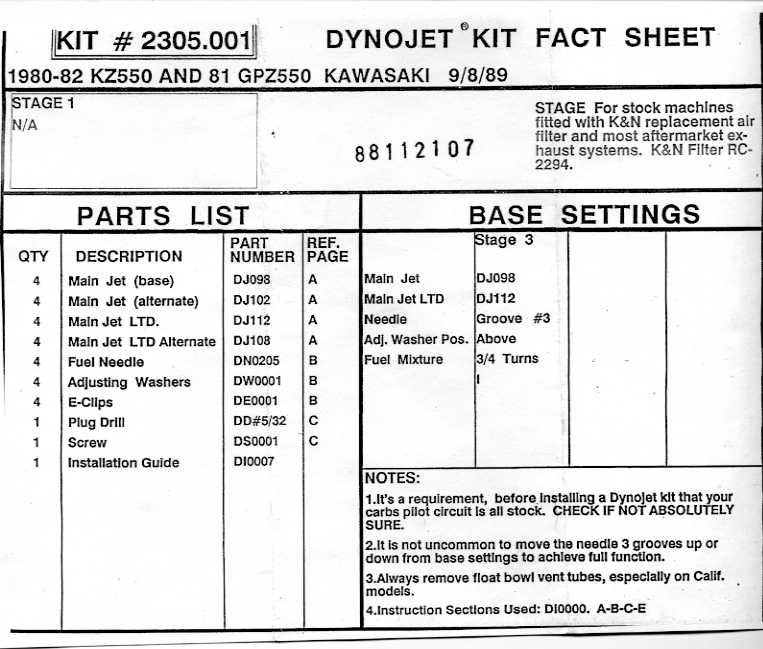
The "NOTES:" in the lower right corner are also somewhat puzzling. It is unclear why the vent tubes should be removed. The carbs work fine with the vent tubes installed as long as they are free flowing and open to atmosphere.
Instructions for the Dynojet Jet Kit
Here are the instructions (in two formats) that come with the jet kit:DynojetKitInstructions.doc
DynojetKitInstructions.pdf
The following is the Dynojet procedure for testing the jetting with a few minor changes in the text for accuracy. The original text can be found in the PDF and/or DOC file. It is presented here because it is very useful for verifying jetting even if no kit is installed.
Dynojet Jetting Procedure
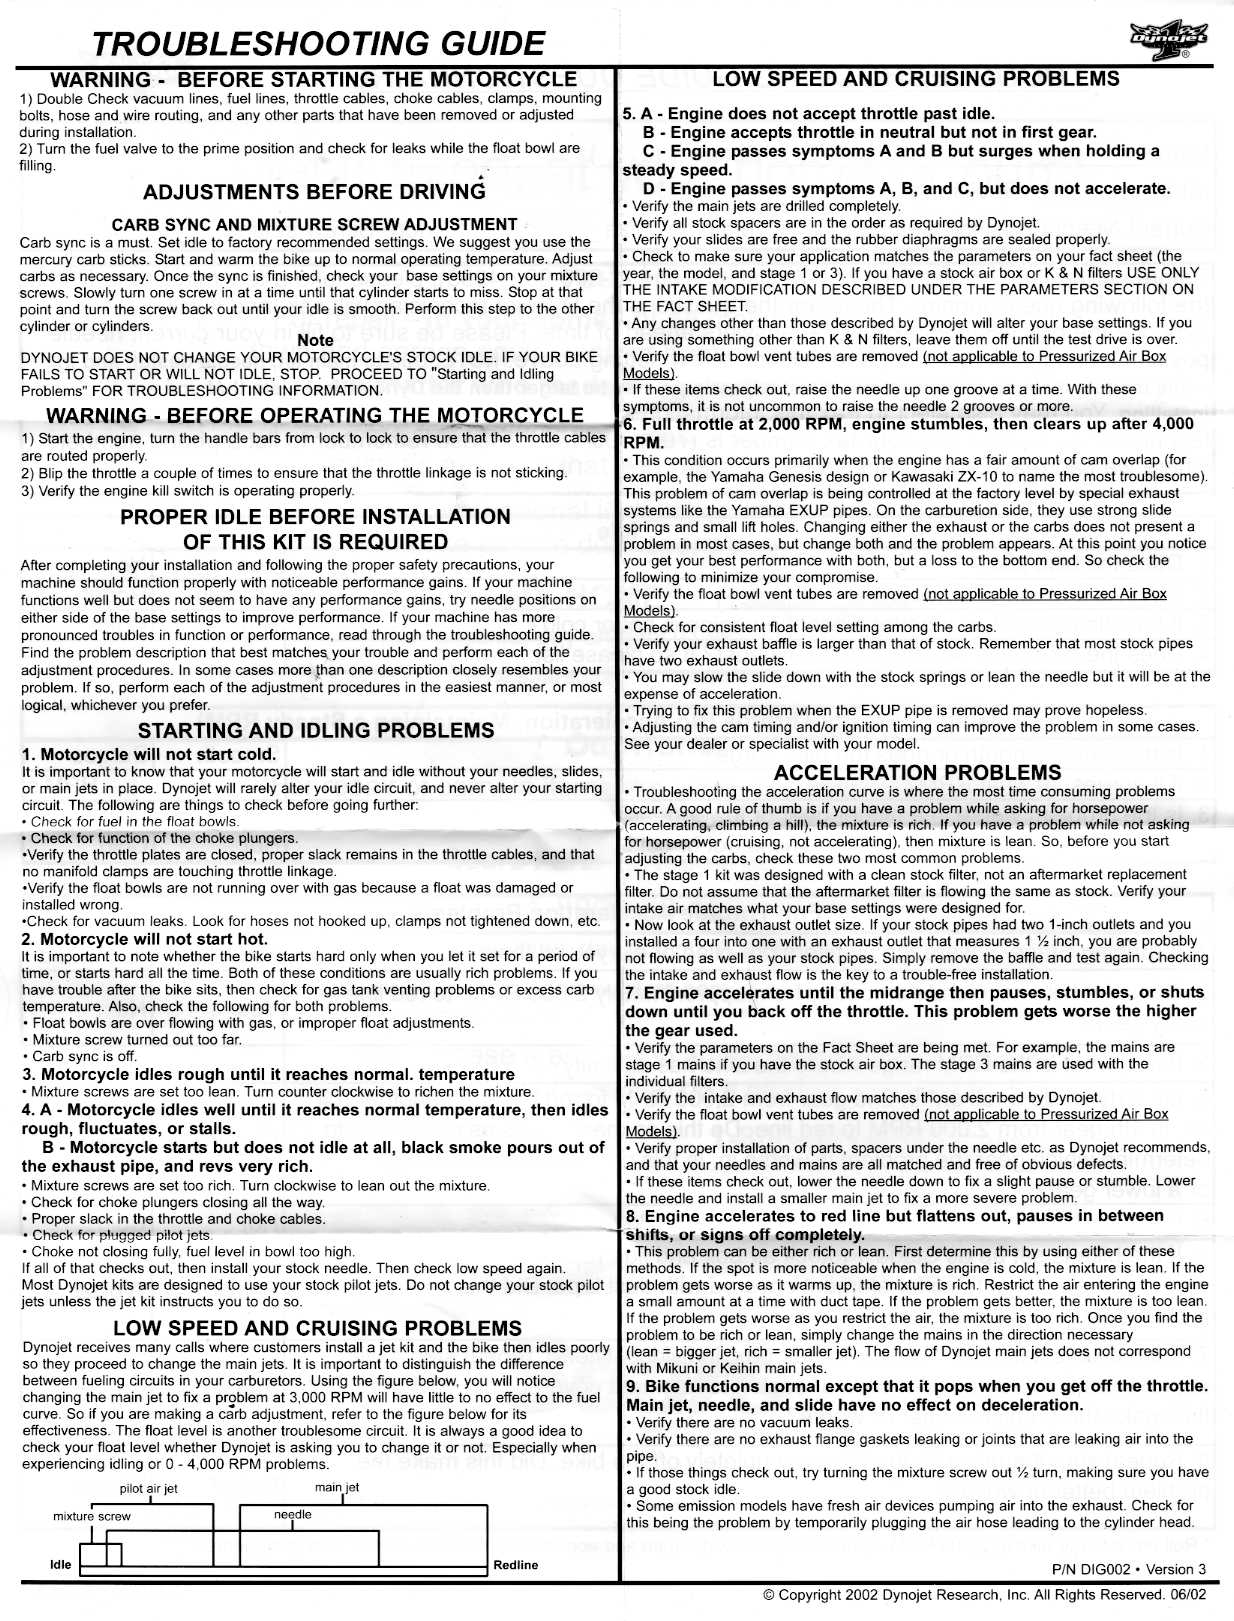
These tests are designed to be used with the recommended (supplied) jets and needles with a Dynojet jetting kit. However, these tests can also be used as a reference, as a stock setup can be verified to be in working order by passing the tests.
Set the idle mixture using an EGA or the lean-drop method. Refer to the manual for a specific procedure.
TEST ONE: Lean cruise test
Now, repeat the test again until the surging is gone.
Note: If you find that the fuel-mixture screws are turned richer 1 to 2 turns past the settings arrived at in the fuel-mixture screw adjusting procedure without having much affect on the surge, or if it stops the surge but causes the engine to idle poorly, the lean problem may be out of the range of the mixture screws and will probably require a needle adjustment. In this case, return the screws back to the settings arrived at during the fuel-mixture screw setting procedure and go to Test Two; "The Moderate Acceleration Lean Test".
TEST TWO: Moderate Acceleration Lean Test
Note: Do not test any higher than the 50% mark. Once you reach this, decelerate back down to 2000 RPM. Repeat this process about 5 times to make sure that any excess oil from the freshly oiled K&N filters is not affecting carburetion. If after the fifth run you notice any type of carburetion problem, the most probable cause under these test conditions is leanness. To correct this problem, move the e-clip to the next richer position. If the carburetion problems are very pronounced, move the clip one full groove. If the problems are more subtle, move the clip a half-groove using shim washers.
Note: Before making any adjustment to the e-clip settings, make sure you check the order in which you installed the needles and any of the required springs, washers, or spacers against the installation instructions.
Note: Air mixture screw adjustments should be done again at each different e-clip setting on the needle. (TK-22 air screws only control air volume into the pilot circuit, but the mixture adjustment should still be done.)
Note: See the
TK-22 page on shimming needles, regarding using washers to raise the needle in half-step increments.
TEST THREE: Acceleration Mode Rich Test
Repeat Test Two and Test Three until you have a setting that will pass both tests.
Double-check the results of Test Three by repeating Test Three in second gear.
At this point, your machine should pass tests one through three. If you wish, you may call your installation complete. An extra measure of performance may be obtained by adjustments found in the next section.
TEST THREE FAILURE:
To do this, reduce the main-jet size by replacing the main-jet with a jet 5 sizes smaller. Then repeat Tests Two and Three.
***** ADJUSTING FOR MAXIMUM PERFORMANCE *****
The following instructions are to make sure you are not jetted in the fringe area.
NEEDLE ADJUSTMENTS:
1) Make sure your machine passes Tests One, Two, and Three.
MAIN-JET:
After the Dynojet system is installed and adjusted correctly, most of the carburetion problems that seem to be caused by the main-jets being too rich are, in many cases, just an effect of some other mechanical condition causing the engine to run at lower than stock efficiency. These conditions include; poor overall state of tune, poorly designed aftermarket exhausts, defective exhaust caused by high-mileage, plugged or non-existent baffling, dented pipes or mufflers, dirty or otherwise defective air filters, or the use of air filters or exhaust systems other than those called for in the chart.
Under these circumstances, it is better to fix the cause than to adjust to the effects.
MAIN-JET ADJUSTMENT:
replace the main jet with jets 2.5 to 5 sizes bigger.
Note: The best way to check the main-jet's performance is to look at the color of the tailpipe after prolonged full-power use. Checking the main in this way will usually be more effective than a plug-check. Due to the increased efficiency in current production motorcycles, a difference that shows up as a white to black color change in the exhaust pipe would be substantially less noticeable on the plugs.
Note: The proper color exhaust for peak racing performance is light tan to very light tan.
Test drive the motorcycle in first gear in the following manner:
Slowly accelerate the machine from idle to 2000 RPM. Maintain that speed for at least 15 seconds. Then increase the speed to 3000 RPM and hold it there for another 15 seconds. Continue accelerating and holding steady at every thousand RPM until you reach 50% of the full RPM range of the engine. During the cruise portion of these tests pay close attention to the engine's power delivery.
If there is a slight surging or hesitation during the cruise portions, this is an indication that the engine is running slightly lean when the carburetors are running in their leanest mode. To correct this, turn the air mixture screws in (richer) 1/4 to 1/2 turn from the position arrived at during the mixture-screw adjusting procedure.
While driving the motorcycle in first gear at 2000 RPM, accelerate at no less than 1/2 throttle and no more than 3/4 throttle to 50% of the engine's RPM band.
While driving the motorcycle at 2000 RPM in first gear, accelerate at full throttle to redline. Do this two or three times. If you have carburetion problems in the upper portion of the RPM range, under these test conditions, the most probable cause is a rich mixture. This assumption would be further strengthened if you went through Tests One and Two without having to make any adjustments. To correct this problem you should move the e-clip to the next leaner position (one clip higher).
If at this point, the machine passes Test One and Test Two but not Test Three, your machine may be running at less than designed efficiency. Some probable causes are given in the main-jet portion of the "Adjusting For Maximum Performance" section of these instructions. If you cannot correct the efficiency loss, you may try to decrease the fuel delivery rate to match the machine's current state of tune.
In the test section you did three tests. Tests One and Two checked to make sure your machine didn't run too lean. Test Three checked to make sure your machine didn't run too rich. Typically, Japanese motorcycles produced in recent years can function with minor modifications without any noticeable flaws at air/fuel ratios ranging from 14:1 to 11:1. Adjustments in carburetor jetting that fall at either end of this range are referred to as "fringe jetting". Fringe jetting is responsible for the common myth that performance jetting must constantly be altered for normal temperature and/or differences in altitude. If a machine is operating in the fringe jetting range, let's say an air/fuel ratio of 11:1 at sea level at 70 degrees, it is likely that a difference of 2500 feet and +20 degrees could change the air/fuel ratio to perhaps 10.5:1, thus causing slight carburetion problems during hard acceleration. The same thing can happen at the other end of the scale, although it is not as common.
Note: If you had to adjust the needle position the first time you did Test Two, and if you adjusted the e-clip in 1/2 step increments, you already made sure that your machine is not jetted in the fringe area, thus you will not have to perform the following procedure.
2) Adjust the e-clip and the adjusting washers to the next 1/2 step leaner position.
3) Once the adjustment is made, repeat Test One and Two.
4) If this new needle-position passes test two without any adjustment, then repeat steps 2 and 3 of this procedure until you FAIL Test Two.
5) Once you have failed Test Two, move the needle back a half step to where it passed Test Two.
In the Dynojet system of carburetor recalibration, the main-jet rarely needs to be changed when the system is installed on motorcycles meeting the design parameters for which it was intended.
A) If your machine passed the three tests and you met the no test requirement in the "Adjusting For Maximum Performance", section
B) If you passed the needle adjustment tests in "Adjusting For Maximum Performance", but have a slight loss of peak power in upper gears,
C) If you have a white exhaust pipe after prolonged high-speed use,