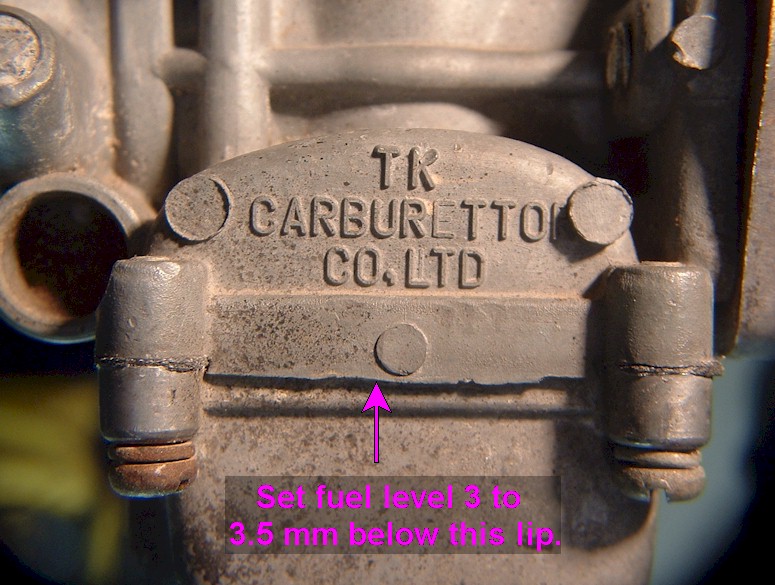
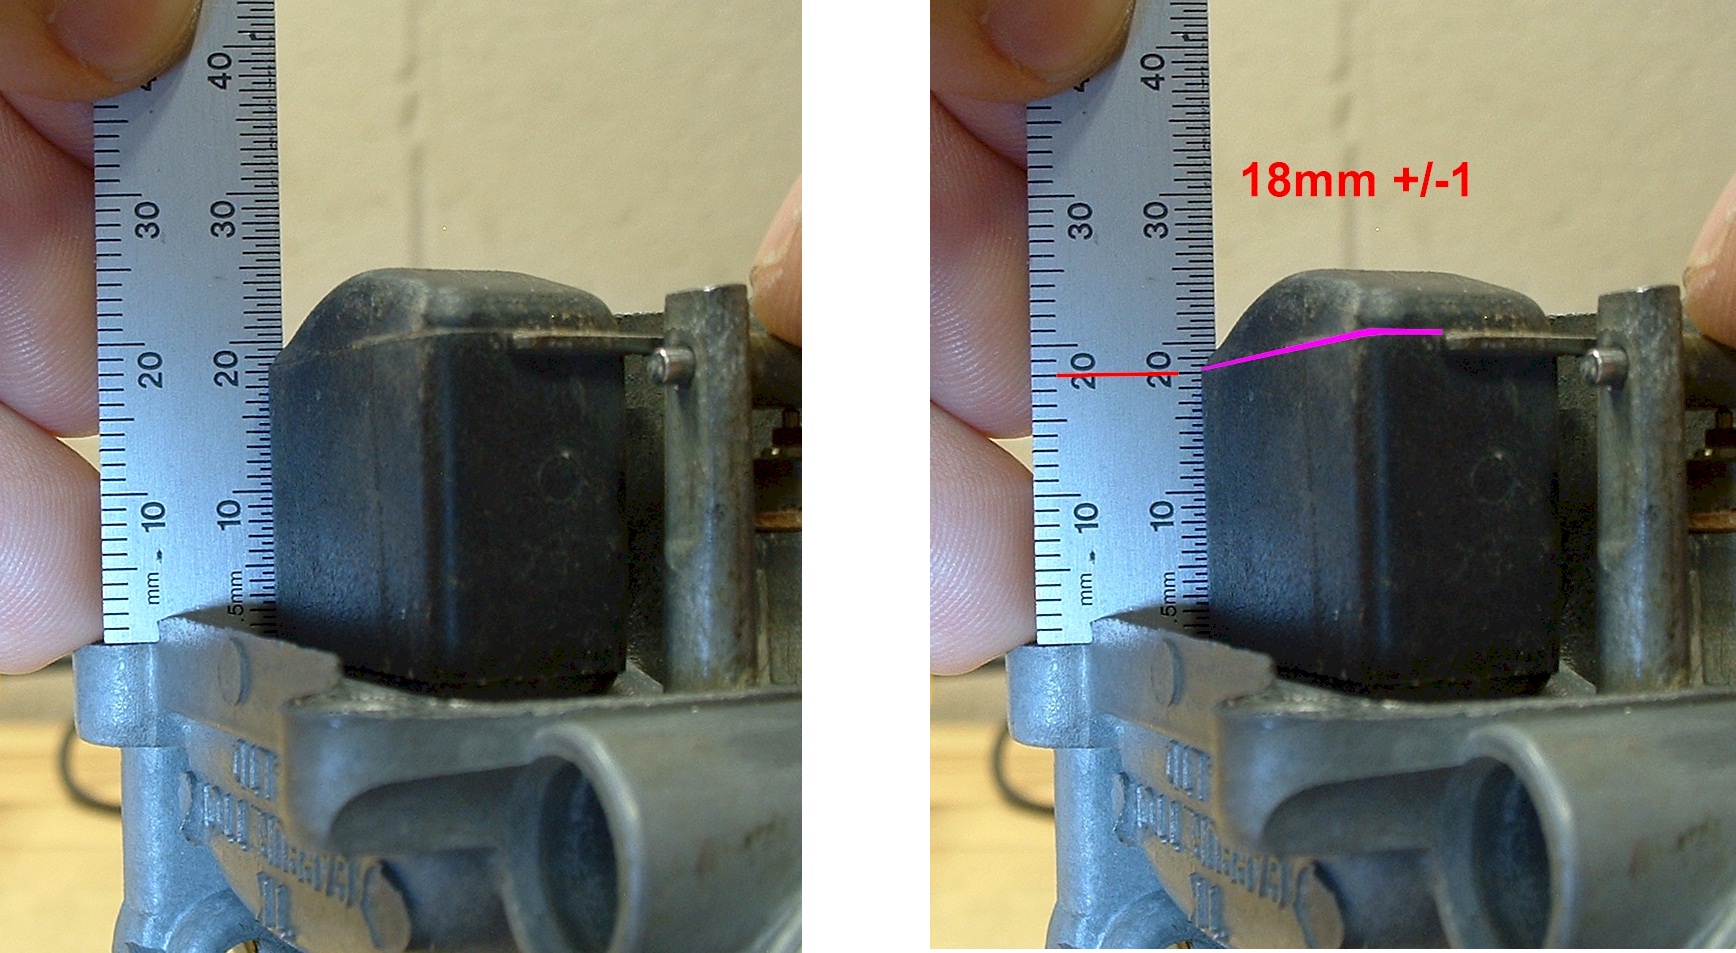
This method is the only way to be sure the fuel level is set correctly. However, this requires the carbs to be fully assembled and filled with gasoline, which is not always convenient while rebuilding. To get an approximate starting point for the setting, a float-height measurement can be done.
If the needle valve was not replaced, and the float bowls were not overflowing, there is likely no reason to reset the float height. Rarely, ever, do the TK-22 float levels need to be adjusted due to normal use. If the needle valves have been replaced using aftermarket replacements, then the float height will likely have to be changed, and needs to be checked.
More than one style of float is used on the TK-22 carbs. They all look similar, but there are minor differences in the float casting shape. It is unclear if this affects the float level or not.
Two slightly different float styles (click to enlarge):
The way to check the float height is to set the carbs upside down. Very gently press down on the float frame at the hinge pin to take out any slop in the hinge. Then lift the other end of the float until the needle's spring-loaded pin is just barely making contact with the float's tongue.
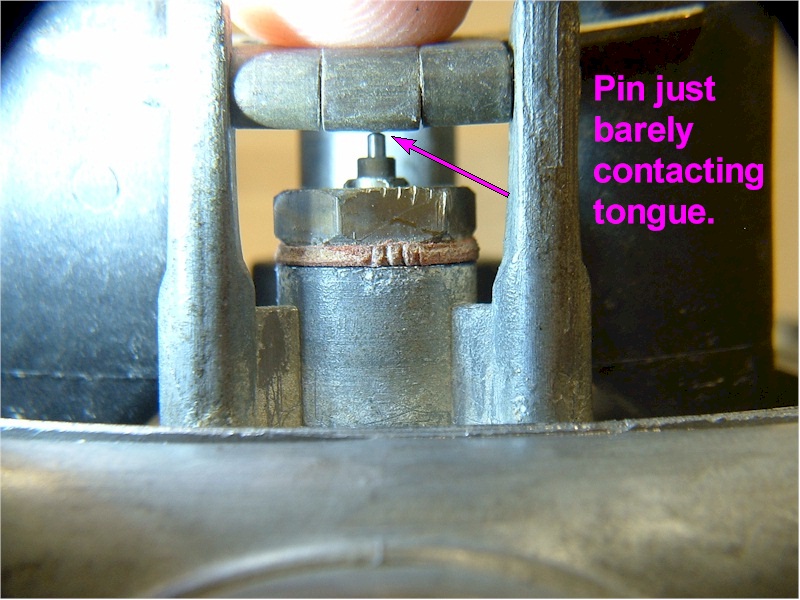
(Ignore the hinge curvature, it is a distortion in the photo.)
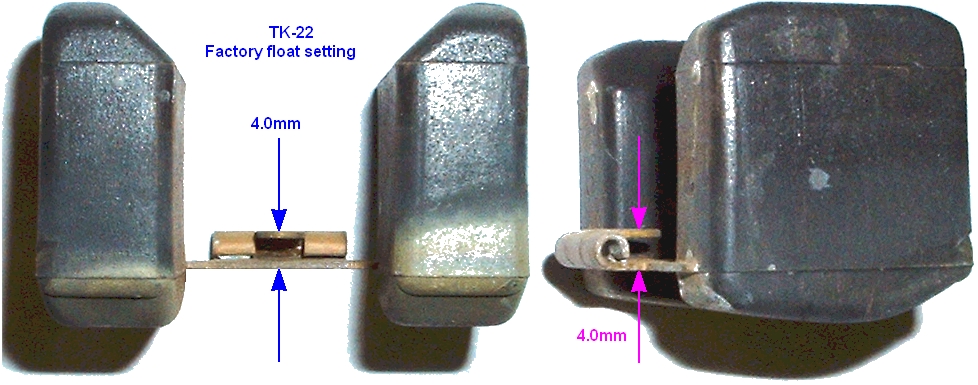
The TK-22's factory float setting on the float tongue was 4.0 mm as shown below.
The height of the needle pin, above the fuel-valve's seat, (with seal removed), on a TK-22 factory fuel-valve is 6.2 mm. Some replacement fuel valves will have a different height measurement.
The height of the entire fuel valve and needle on a TK-22 factory fuel valve is 15.1 mm.
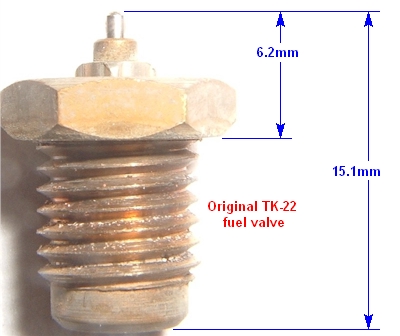
By measuring the needle height on a new fuel valve, finding the difference from a factory valve, and compensating on the float tongue, an alternative method of setting the dry float level can be accomplished. For example, if a new valve's needle height measures 6.4 mm, the difference from the factory valve is .2 mm. The float tongue would be adjusted from 4.0 mm to 3.8 mm. This method requires that the frame of the float has not been distorted. If the float frame has been altered in some way, the actual fuel level may be affected. For this reason, the clear tube method, as specified in the service manual, must always be used to verify the actual fuel level setting.
For that, a small, rubber vacuum hose pressed into a larger clear hose works well.

versus
Throttle Slide Position
Once the slide reaches fully open, that is, when the bottom of the slide is flush with the roof of the carb bore, the amount of air entering the engine will not increase. However, if the slide goes further up, the needle goes higher and the amount of fuel entering the engine increases. This has the effect of enrichening the mixture. Depending on how the carbs are jetted, this may be a good thing, or it may be a bad thing. Since the stock jetting is often slightly lean, usually this enrichement is beneficial. If, however, the carbs have been rejetted, and are no longer lean, the extra fuel may actually reduce power.
One way to check for it being too rich, is to ride at full throttle for a little bit, then slowly very roll off the throttle. If the bike seems to speed up, initially, then the slide is too far past fully open, and the mixture is getting too rich at WOT.
If the bike does not increase speed, or actually decreases speed when the throttle is rolled off of WOT, then most likely the slide position should be left alone.
Running the bike with the throttle stop set to allow the slide to go past fully open may help prevent possible lean mixtures which should be avoided especially at WOT. But, because this condition can throw off any jetting procedure being done, and can mislead the tuner when selecting main jets, the slide should be set to stop at fully open during testing, (or even during normal running as long as the jetting was selected for this).
To adjust the ful throttle stop position, adjust the stop screw.
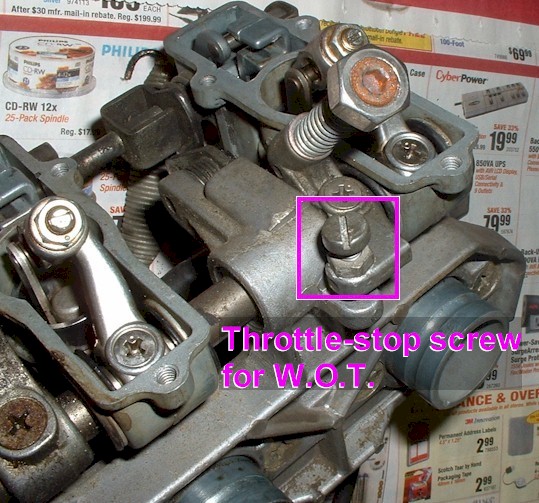
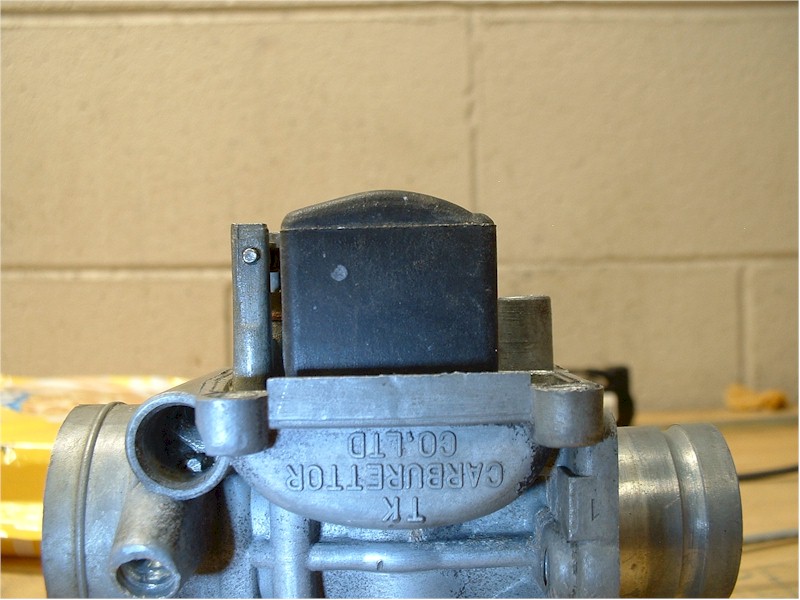
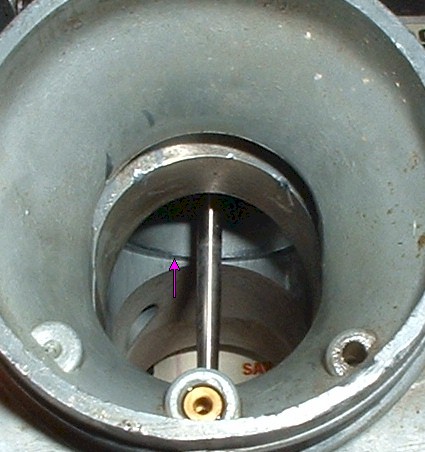
The idea is to set the bottom of the slide flush with the roof of the carb bore as shown in this photo. This photo is taken while looking into the air horn side of the carb.
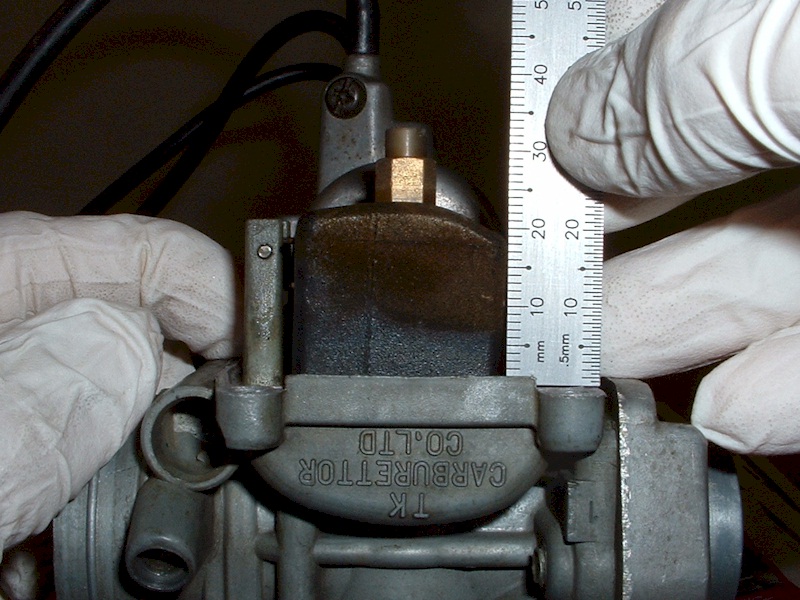
However, it can be inconvenient to remove the carbs to adjust or simply verify the stop setting, so it can be done while the carbs are still installed on the bike. To do this, remove the top covers from the carbs, or at least on one carb, and get a very accurate depth gauge. They usually come on most metal measuring calipers. The top edge of the slide will be approximately 10.8 mm from the top of the carb body casting. To be sure the slide is open all the way, set the depth measurement to about 10.6 or 10.7 mm. The measurement must be done without the gasket on the top edge of the carb, so select one of the 4 carbs that does not have the gasket stuck on.
The main page has a diagram that shows the measurement.
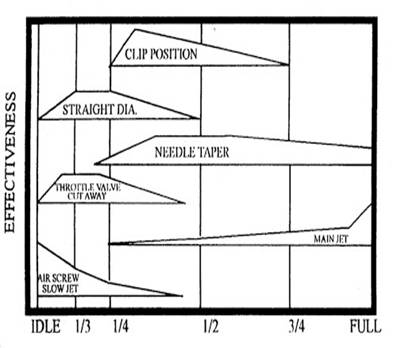
This next diagram is specific to the TK-22 carbs, but is very similar to the generic diagram. This diagram is just a very general, qualitative diagram arrived at during testing using an O2 sensor.
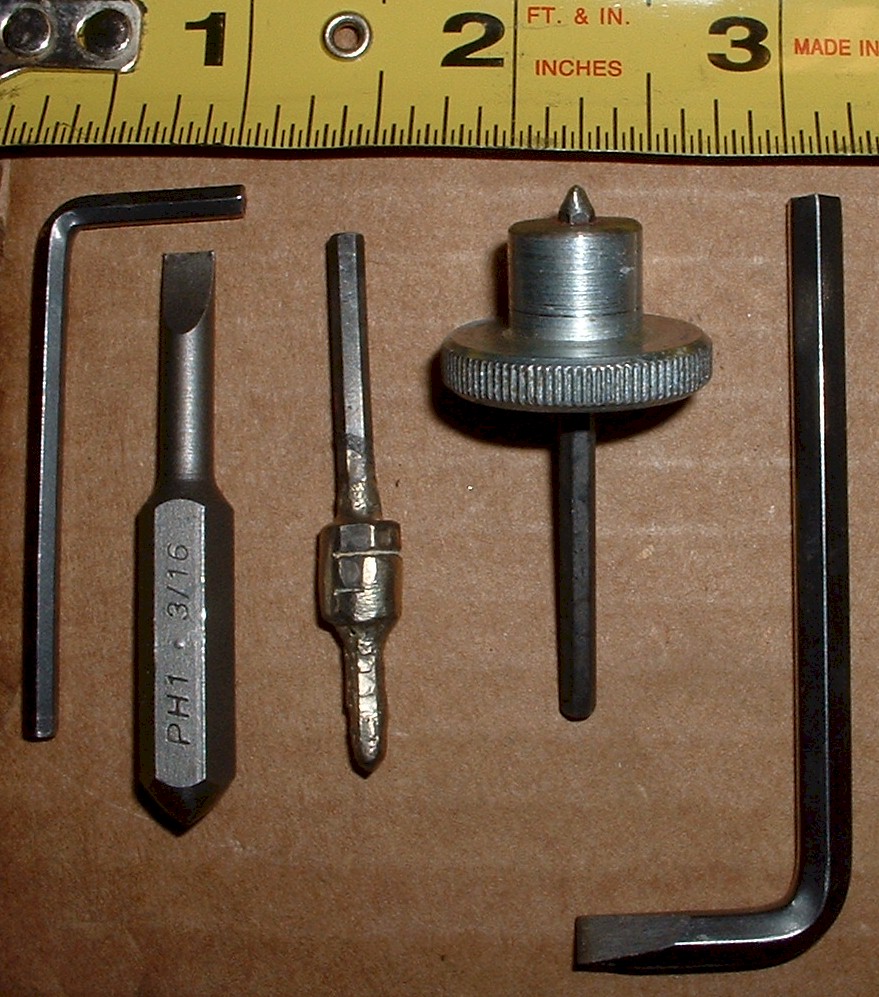
Here are some of tools that can help in changing jets without removing the carbs from the bike.