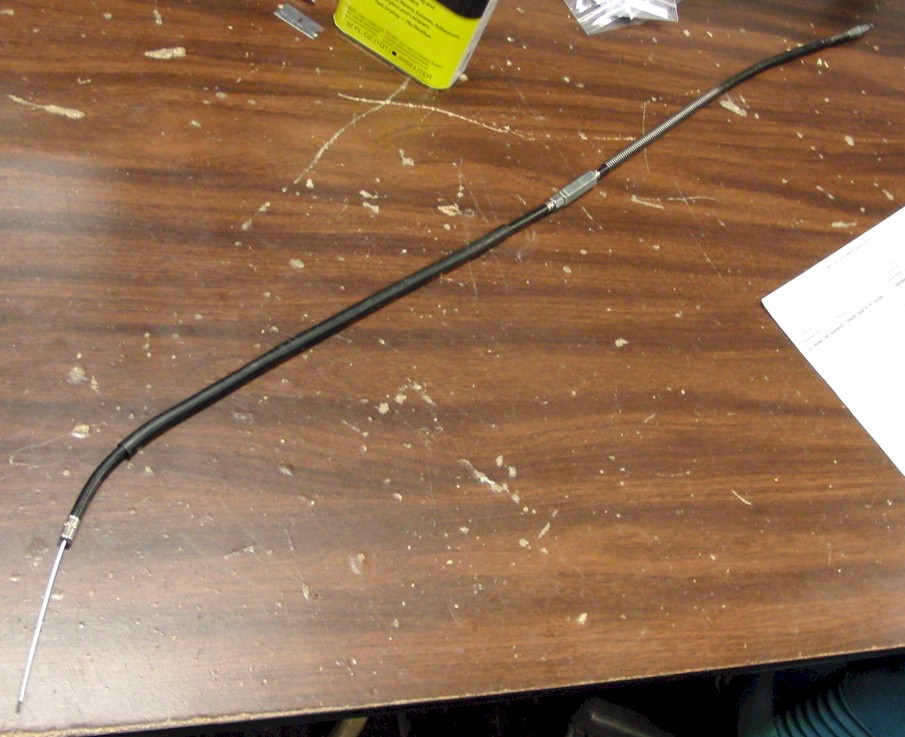
Here are some measurements on the Kz550D1 cables. These overall-length measurements only apply to a 1981 Kz550D1 Gpz. Other Kz550 cables would likely be longer, but the free length, described in this gif, would be the same. When measuring the cable for cutoff, remember to leave that extra 5/16" portion for the new barrel on the lever end. That is 5/16" more than the effective cable length as shown. Also note, the effective cable length is measured from the shoulder of the actuator end, not the very end of the cable.
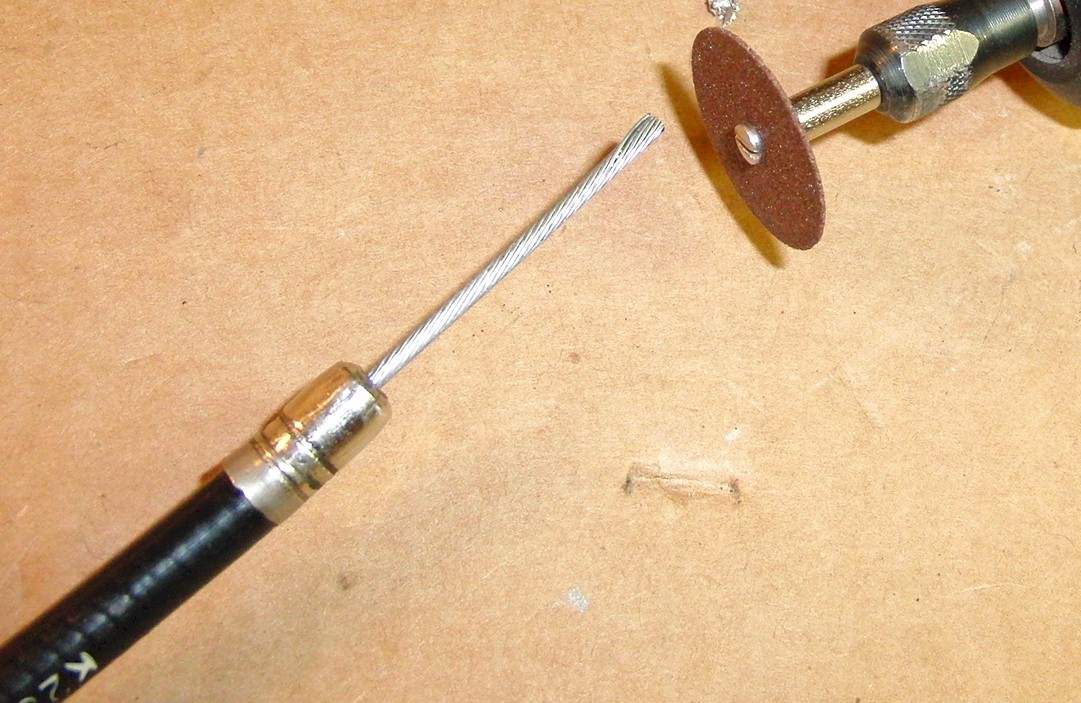
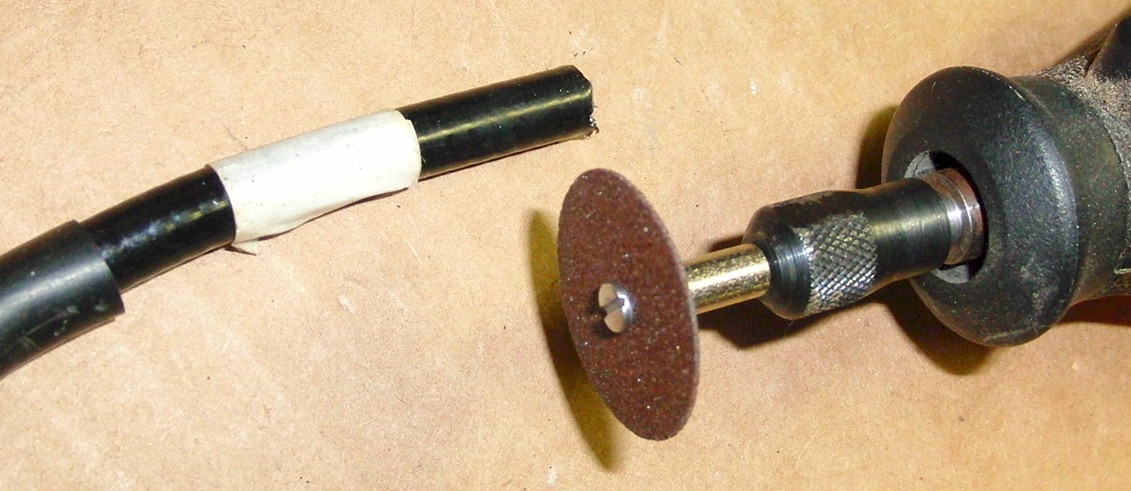
Use a dremel tool or other high-speed, abrasive, cutoff wheel to cut the cable and housing.
Cut the lever barrel end off.
Remove the housing from the cable.
Cut the housing to length. I usually cut the upper housing section at the lever end.
Dress the end of the housing with a file or grinder.
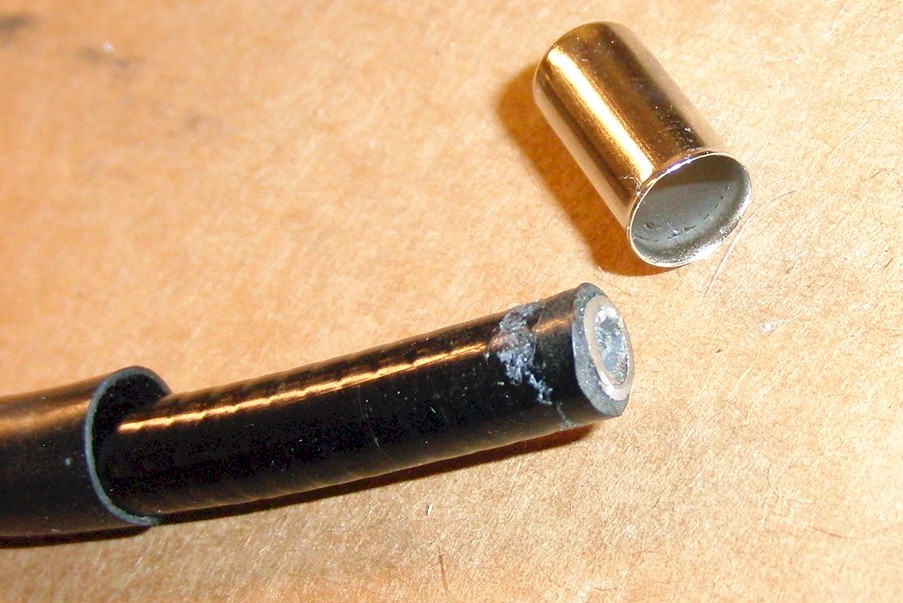
There are methods of re-using the old ferrule. You can heat it to remove it from the housing by melting the vinyl. Then, clean up the ferrule using the back end of a 1/4", or slightly larger, drill bit to "un-crimp" the ferrule from the inside by working into the ferrule.
Or you can get a new one from MikesXS online. The part is 7mm housing end 51-9113 . It is listed correctly in the description as 7mm, but it shows up in the ordering cart as 8mm... probably an error.
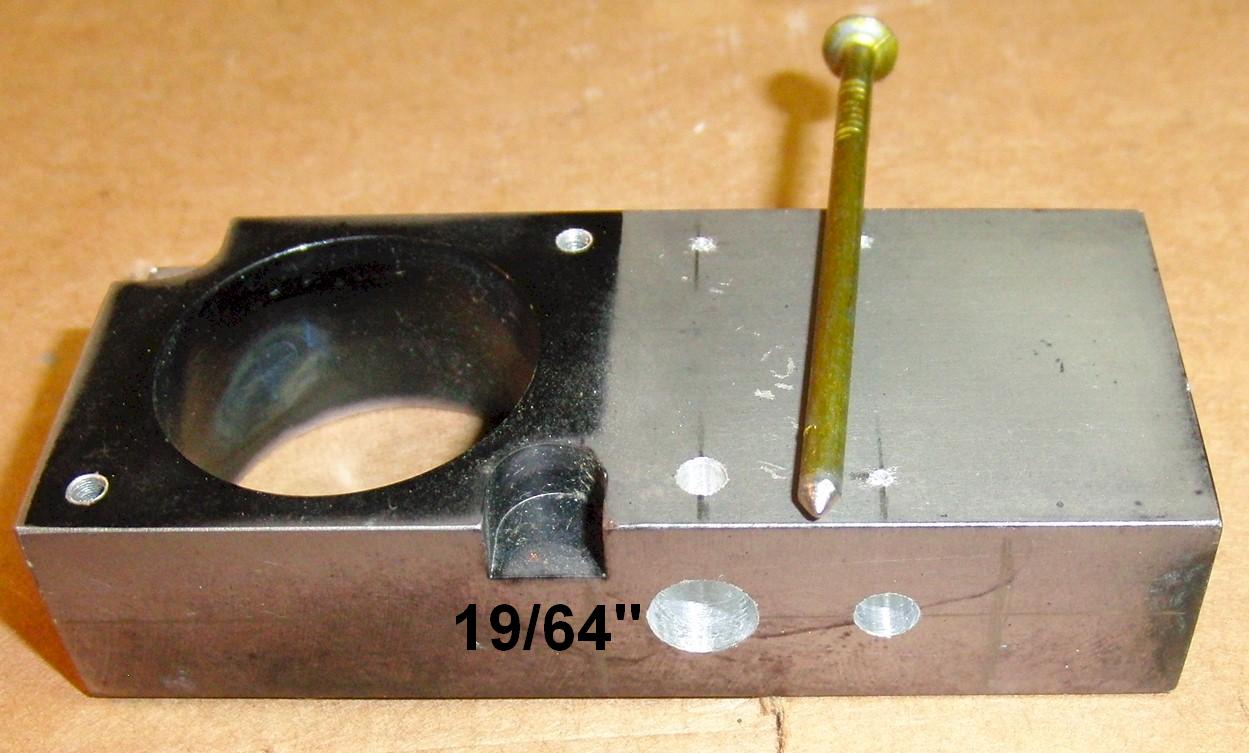
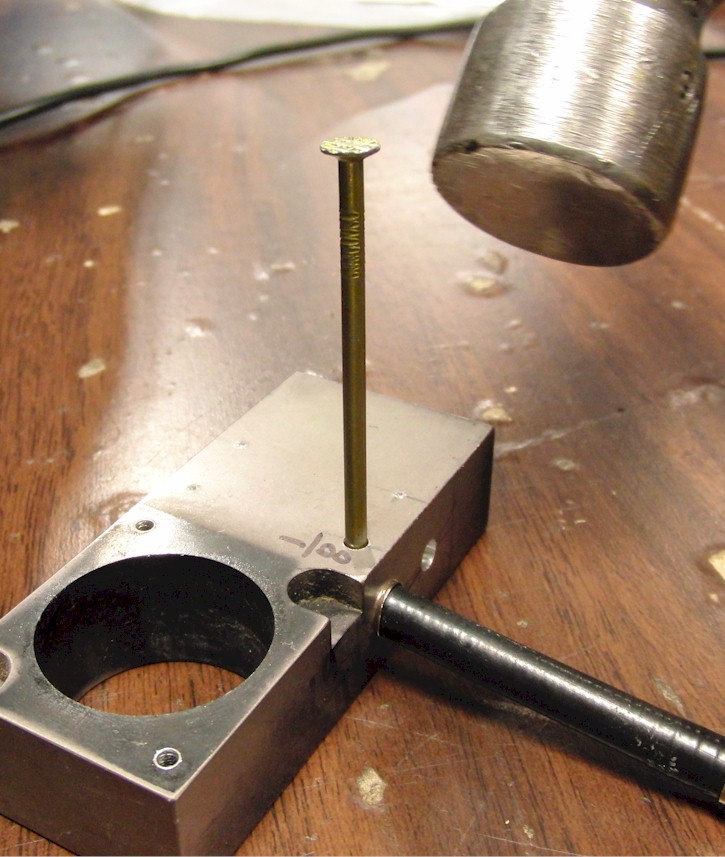
You can make a simple crimping tool with a block of hardwood or metal. Make the nail dull so it won't puncture the ferrule. The hole is 19/64" for the MikesXS ferrule. Other ferrules may require the hole be a size larger or two. Drill an 1/8" hole perpendicular to the main hole.
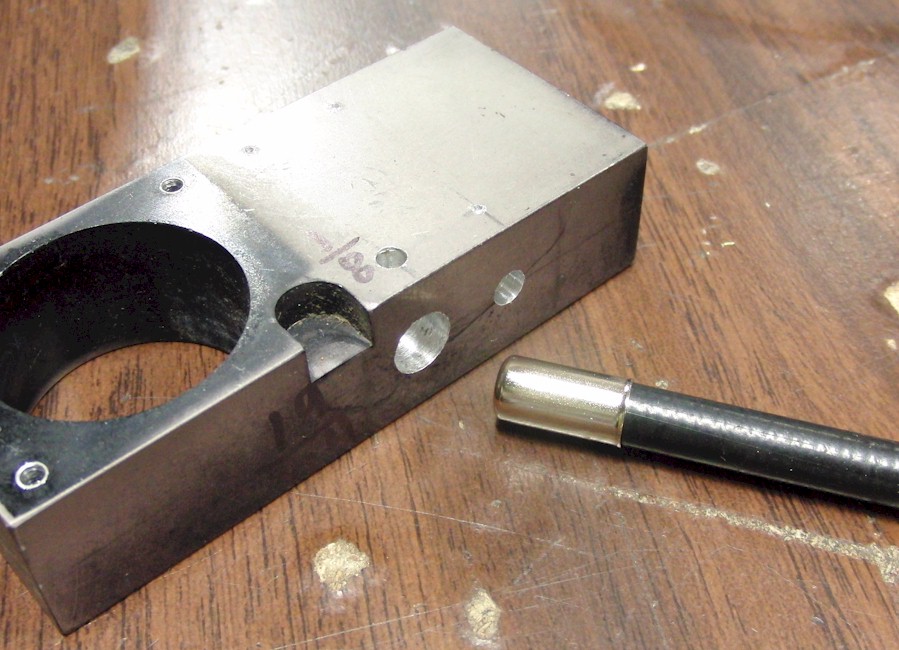
Make sure the ferrule is all the way over the end of the cable housing.
Tap gently as the ferrule is very thin. It only needs to hold on until the cabel is installed. Then the cable tension will keep the ferrule in place.
Reassemble the cable.
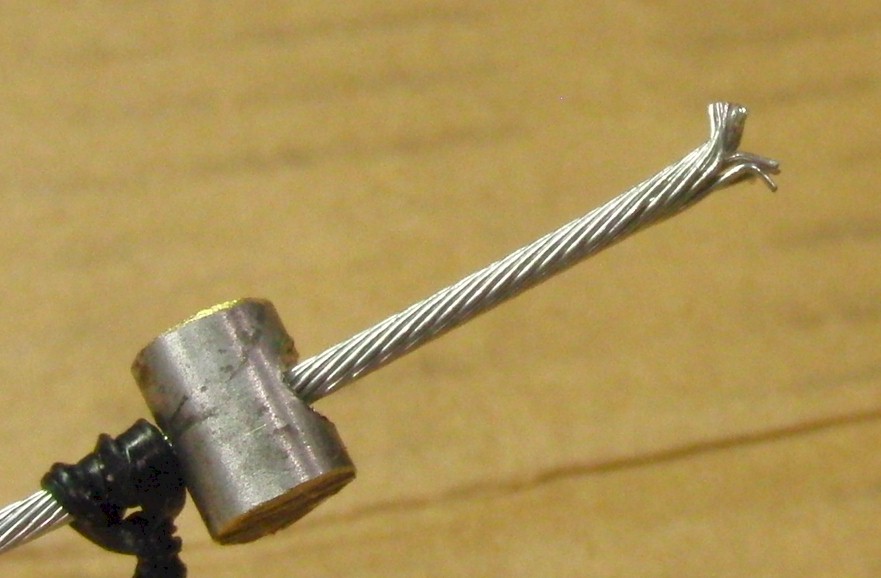
Wrap a heavy duty twist-tie about 2 inches from the end of the cable. This is to prevent it from unravelling any further than this point. Make sure to use an actual, heavy-duty twist-tie with a steel core, and not some copper electrical wire. It needs to be flexible and strong and needs a plastic outer layer. The plastic grabs the wire better than plain steel. Copper wire is too weak and prone to breaking while twisting.
The cable has an outer layer and an inner core. Unravel the outer layer, keeping the inner core in tact. I use a razor blade to dislodge each individual wire. Try to do this orderly, and one wire at a time.
Do not let any of the wires get kinked or permanently distorted at all, or it will not twist back together nicely. It takes a very gentle hand here.
This was a used cable that was cleaned before unravelling, but notice the inside of the cable remains oily and dirty. That is why the cable must be unraveled to clean it properly. It will twist back up very easily after it's clean.
Do not let any of the wires get kinked or permanently distorted at all, or it will not twist back together nicely.
Next wrap the inner core with a twist-tie to prevent it from unravelling too far. Cut the ends off short on this twist-tie.
Do not let any of the wires get kinked or permanently distorted at all, or it will not twist back together nicely.

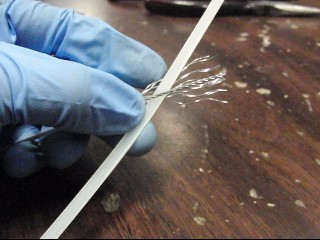
Unravel the inner core down to the twist-tie. Try to do this orderly, and one wire at a time.
Do not let any of the wires get kinked or permanently distorted at all, or it will not twist back together nicely.
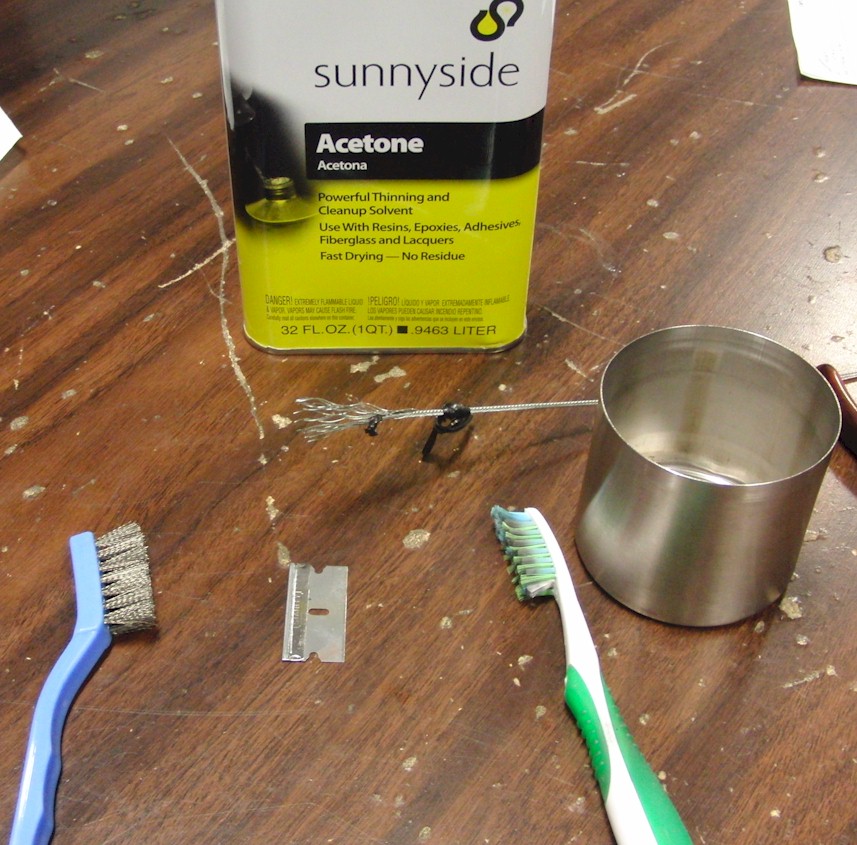
Use acetone and a brand new brass or stainless brush. You can also use a clean toothbrush for getting the oil off, but make sure to use a metal brush to put scratches into the wire coating. Also clean the barrel end. Leave it soaking in the acetone, and be sure to scrub it shiny.
Acetone dries very fast so make sure to keep soaking the end and brushes. It takes about 5 to 10 minutes of gentle brushing to really get it clean.
Do not let any of the wires get kinked or permanently distorted at all, or it will not twist back together nicely.
It should be very shiny, clean, and dry b efore re-twisting.

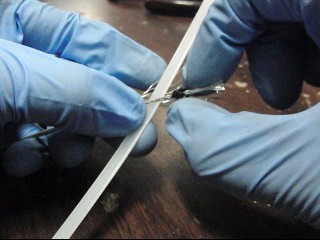
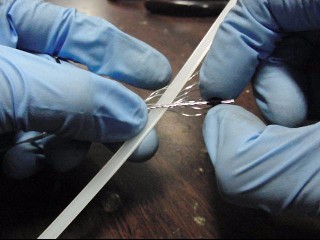
Here is a video showing how to re-twist the core back together. It's pretty easy with the twist-tie on there. Make sure the wires don't get kinked, and slowly twist off the twist-tie in the direction of the core twist. Make sure the twist-tie does not come completely off before you are sure the core is twisted together completely.
In case the video is not available, here are some screenshots:
Here is a video showing how to re-twist the outer layer back together. It is very similar to twisting the inner core, but the twist should be in the opposite direction. On the outer layer, you can re-twist it back together with your fingers. Leave the twist tie on it about an inch or so from the end. This will provide a stop for when the barrel end is installed. This will prevent the barrel end from getting contaminated by the oily portion of the cable.
In case the video is not available, here are some screenshots:
Sometimes no matter how much care is taken, the re-wrapping of the cable end blows up into a mess. If you have extra cable around, it may be helpful to practice cleaning and re-wrapping the cable. If it does blow up, do not get frustrated and start forcing wires. Once they get bent or kinked, it gets much more difficult to straighten out. If the inner and outer wires get mixed somehow, take a piece of wire or a twist tie, and try to separate them into inner and outer groups by moving all outer wires to one side of the twist tie, one at a time. It's tedious, but can be done. The remaining wires will be the inner core wires. That will make it easier to get it back together. Remember the inner wires twist opposite of the outer wires. I think there is also a center wire that has no twist, in some/all cables.
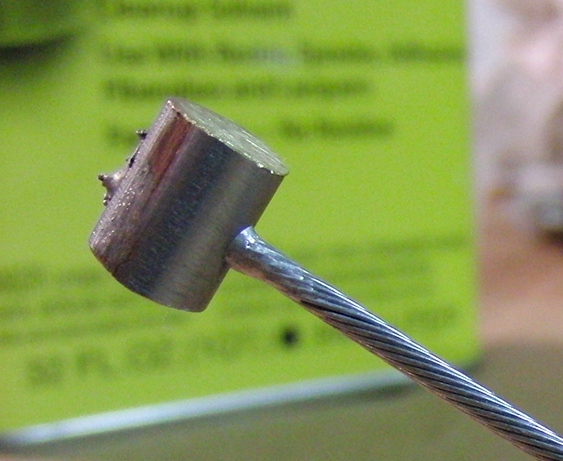
Install the barrel end. I used a home-made brass barrel end. MikeXS has them for sale as well: 7.8 mm cable end 51-9110 . Make sure the barrel end is clean, and is complete (MikesXS barrel is a two-part barrel, brass and steel).
Then bend the end of the wires at a sharp angle so they will prevent the end from coming off. The wire ends should also be able to hold the barrel in place during soldering. Bend or kink the wires so they will hold the brass part in place when the cable end is held up vertically. But make sure they do not protrude too far past the end of the barrel or they may interfere with installation in the lever. You don't want to have to grind the bends in the wires. Doing so may weaken their holding ability. As mentioned above, the remaining twist-tie stops the barrel from traveling down to the dirty portion of the cable.
The cable end must be able to fit into the lever, so make sure there is clearance.
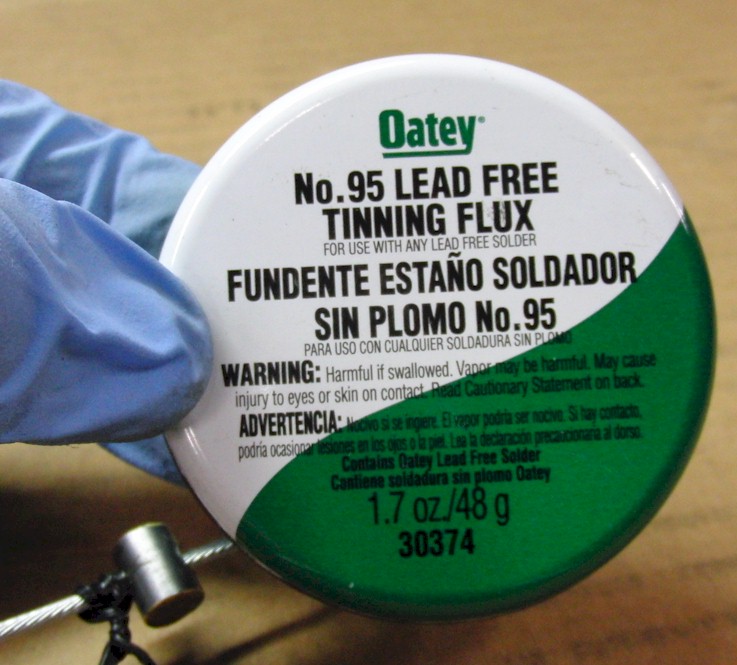
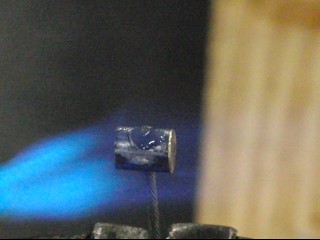
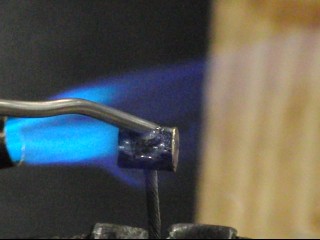
Tinning flux is extremely important. I used lead-free plumbing solder along with the matching flux. This may not be the strongest solder to use, but it worked pretty well.
Use plenty of flux and a good brush so the flux is embeded into the cable strands. Then coat the outside heavily so the flux coats the inside of the barrel when the barrel is moved up. The wire ends should stop the barrel from coming off, and should be strong enough to hold the end while soldering.
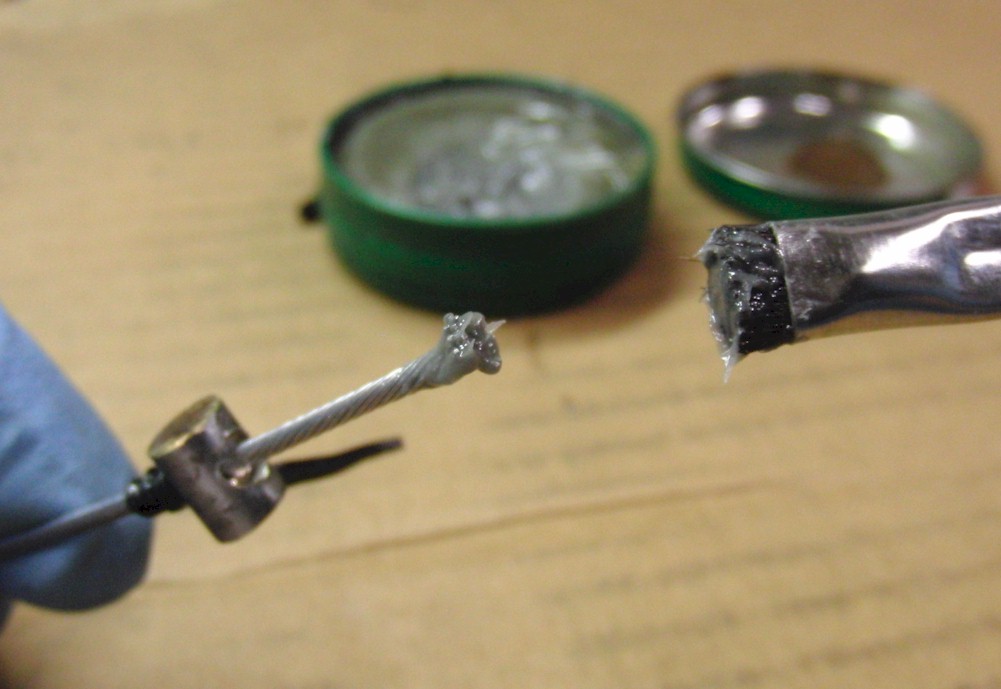
Use plenty of flux, but be aware, solder will flow to wherever the flux is, so keep it neat as possible.
This is the solder I used.

Here is a video of the soldering process. I used a paper towel to wipe excess, but it would be preferred to not really have to do that. As mentioned, this page is not going to discuss much on how to solder. It assumes you are already proficient at soldering. Note, if the wire gets discolored during soldering, then it has been overheated and will be weakened. It never needs to get that hot to solder.
In case the video is not available, here are some screen shots:
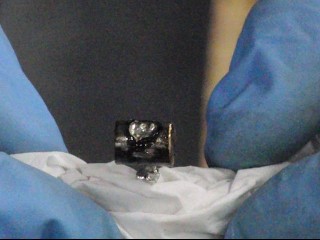
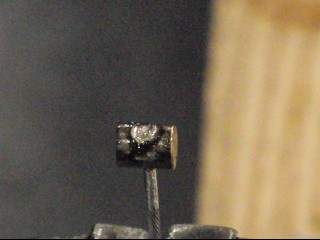
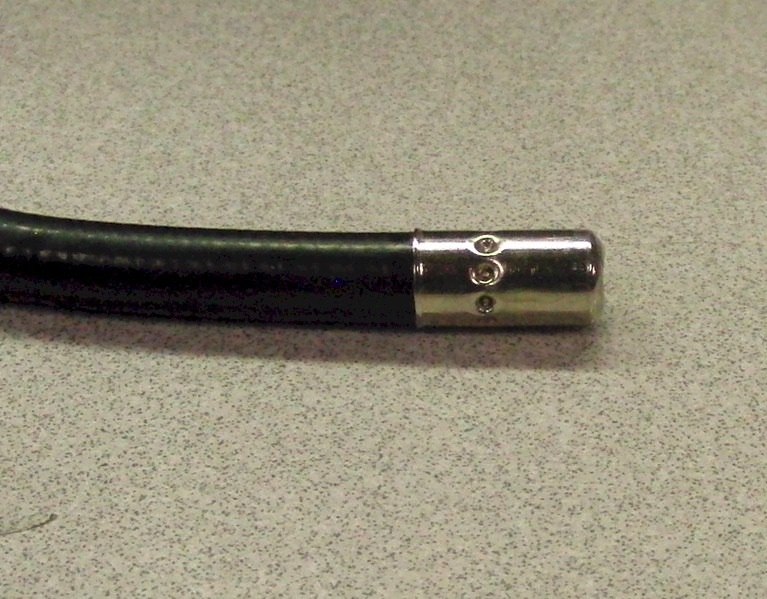
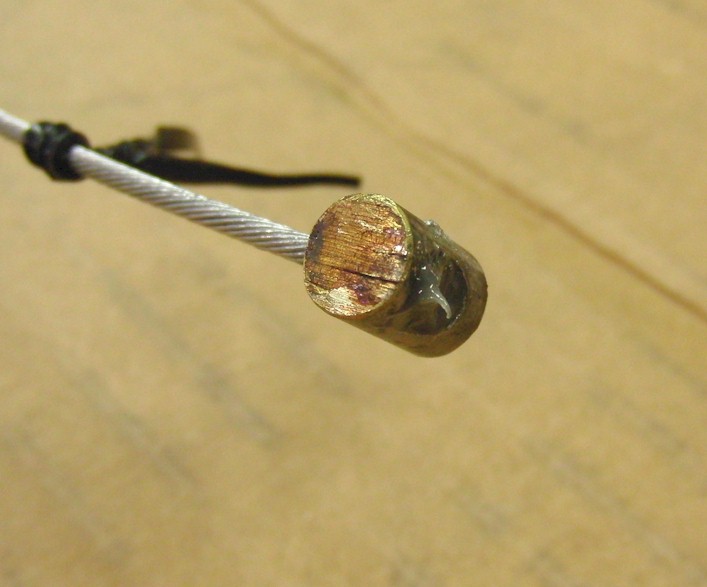
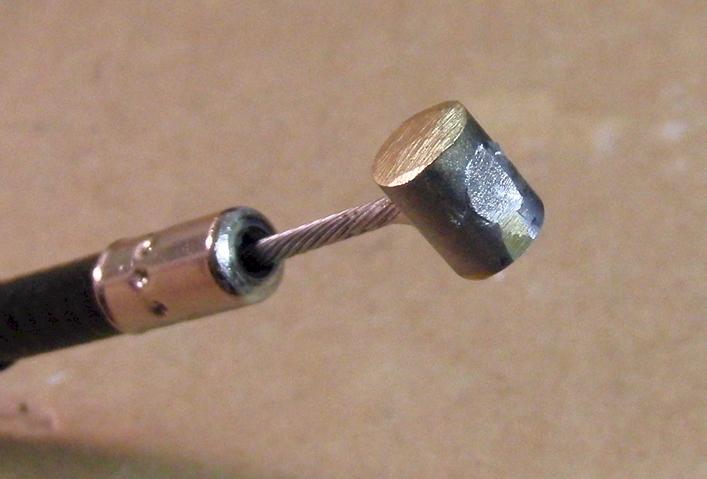
Here are some finished photos of a cable completed earlier.
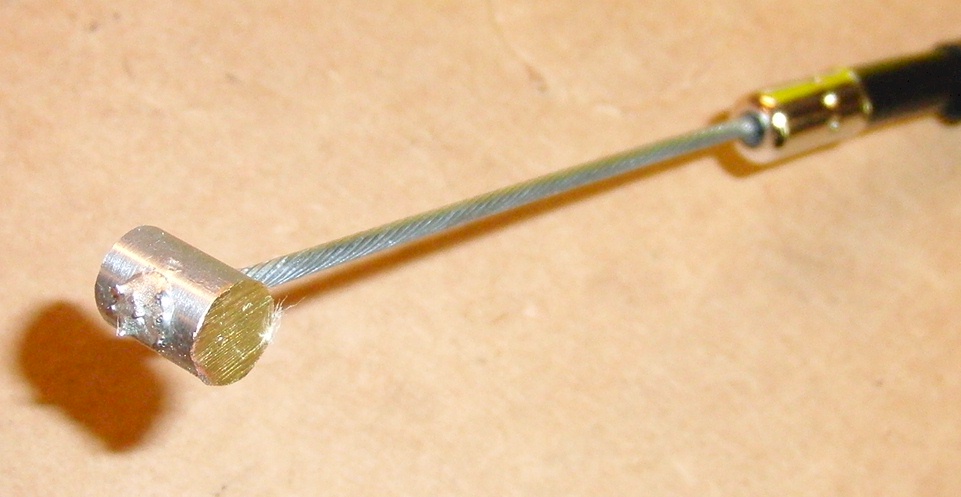
Be sure to wash the remaining flux off with plenty of water. It is acidic and will slowly eat the cable.
You can dress up the end for looks, but it is not necessary.
Stress Testing Samples
In order to be sure this method would produce cables strong enough to use, several tests were done. One sample was made and stressed to failure in order to cut it open and see how it failed internally. It appears the solder, itself, is what let go. The solder clearly penetrated into the wire strands, and it mostly filled the barrel cavity, with the exception of some air bubbles. The failure tension is estimated to be over 500 lbs. This failure was done using an actual clutch lever assembly. It took two hands at full strength to get the cable to slip about 2 mm out of the barrel. Then it was cut open with a saw for inspection.
Measuring Cable Tension Requirements
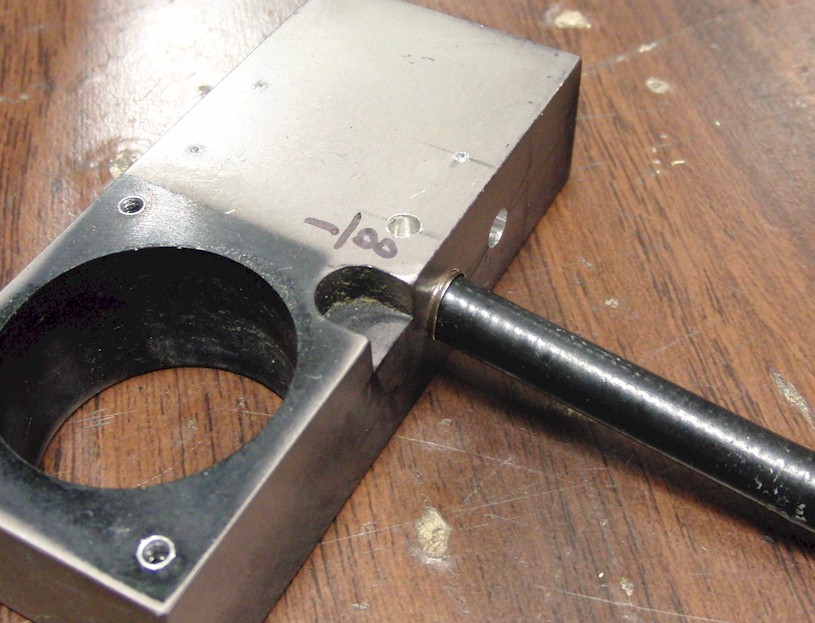
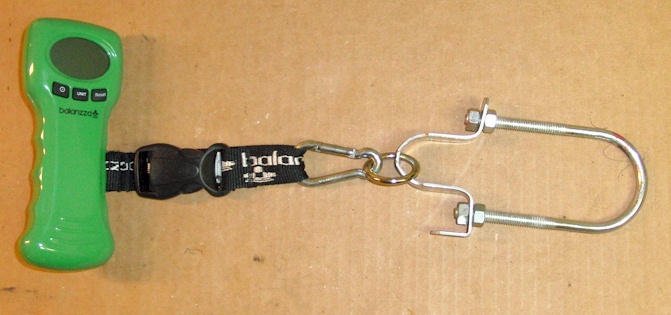
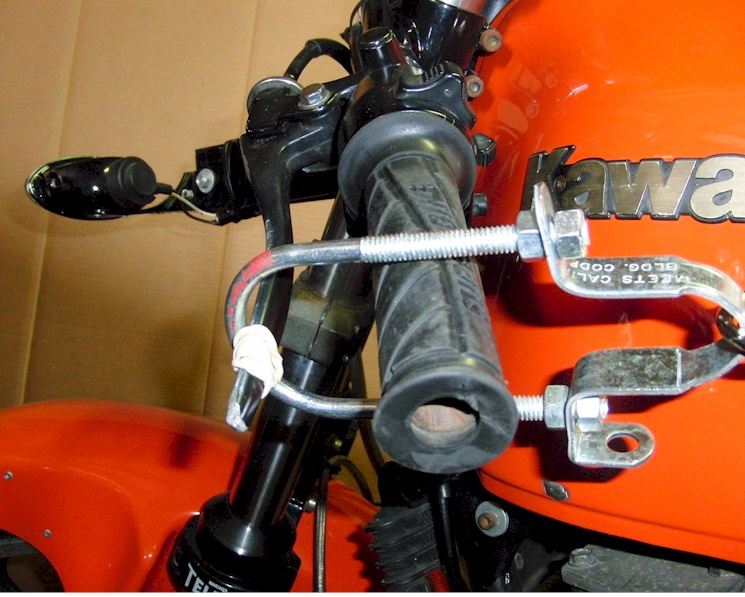
Now that it was seen that a custom cable could produce in excess of 500 lbs of tension, the next step was to measure what the typical tension requirements are in a Kz550 clutch cable. To do that, the clutch would be activated by pulling it with a luggage scale. Before that could be done, a stop device had to be fabricated. This was just a simple block providing the means to hold the cable housing while the cable was pulled.
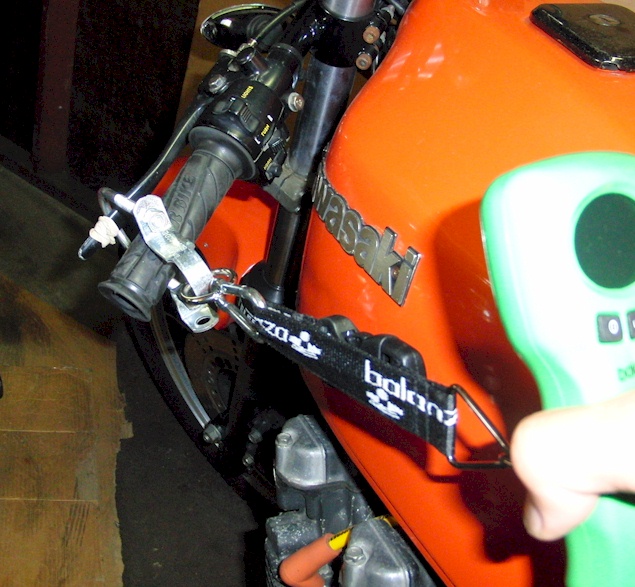
When the cable has curves, this greatly increases the cable tension during a pull. As a further test, force measurements were made on the actual lever, with the cable fully installed.
The pivot of the lever to the cable end is about 1.125".
On another Kz550, with stock spring tension on the clutch, the peak lever pull was measured at 17 lbs. That equates to about 64 lbs of tension on the cable end during a lever pull.
So a stock Kz550 clutch, with a good, lubed cable, will have about 60 to 70 lbs of tension on the cable end during activation.
Testing Cables
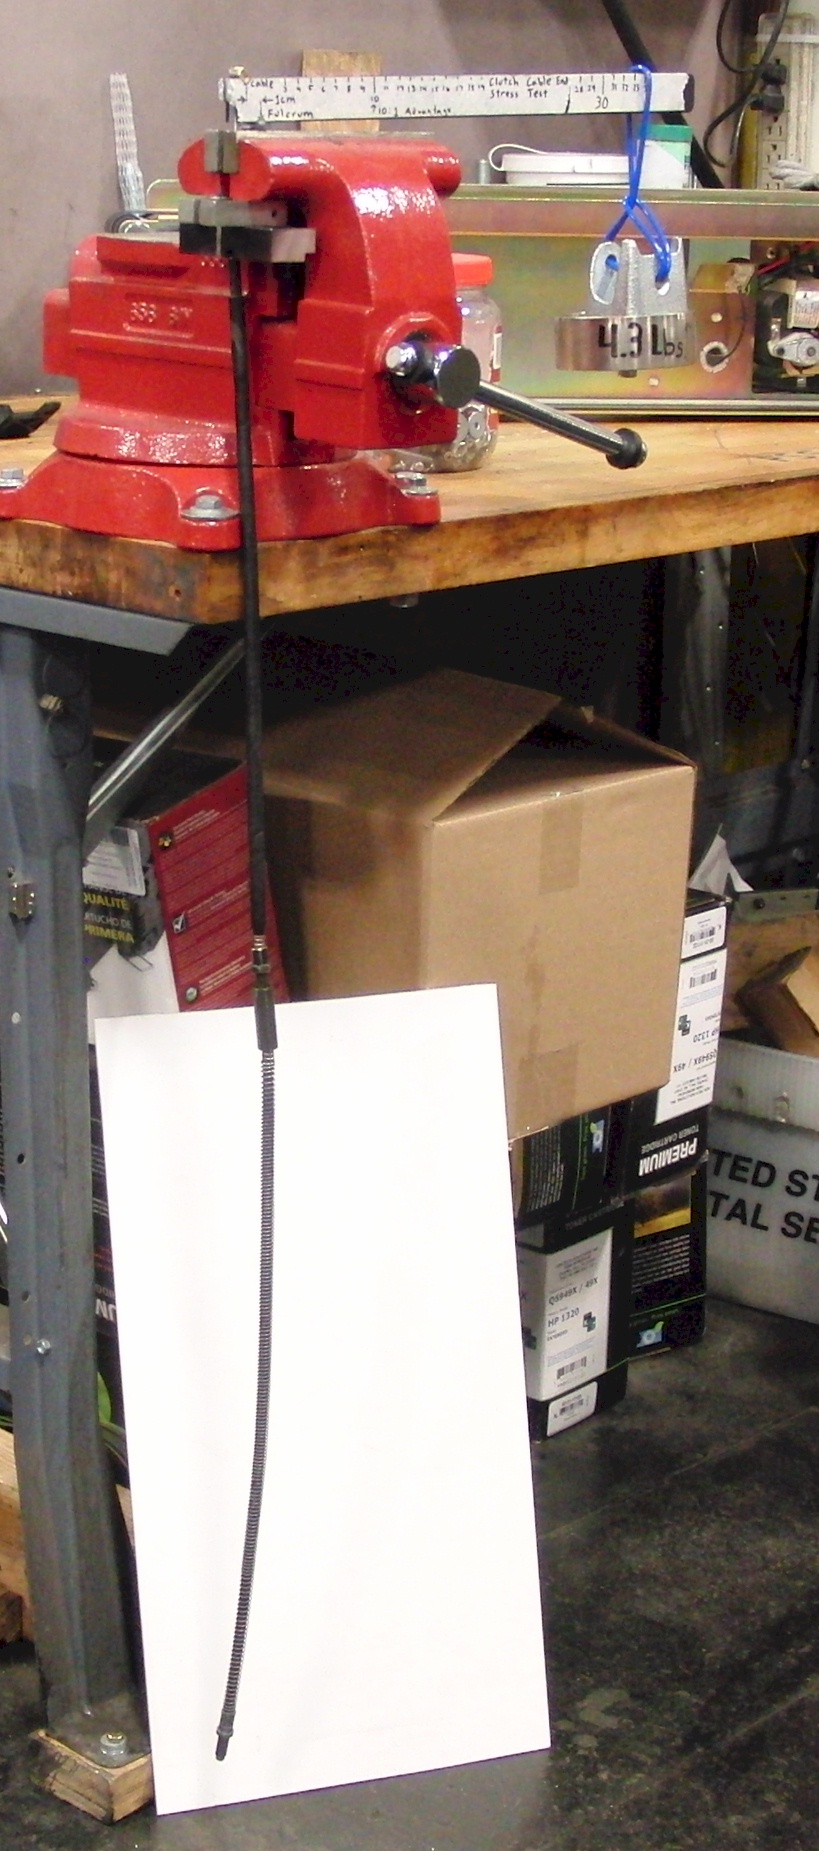
Here is a test of a completed cable. 4.3 lbs of weight was applied with a 34:1 leverage, which produces 146 lbs of tension on the cable. Tension was kept low since this was not to be a destructive test. Tension was about double of what the cable would be expected to handle. The load was applied for about a half hour. As would be expected, the cable slowly stretched slightly over that time, and the inline-adjuster was used to compensate. (It may have been apparent stretch, as the same adjustment would be necessary if the new ferrule started to conform to the shape of the retaining block, which is likely what happened.) The new cable-end held without any slippage.
A second sample was made using part 51-9110 from MikesXS. It is a two-part cable end. The steel barrel is floating and is stopped by a brass ferrule on the cable. The construction procedure is basically the same as described above.

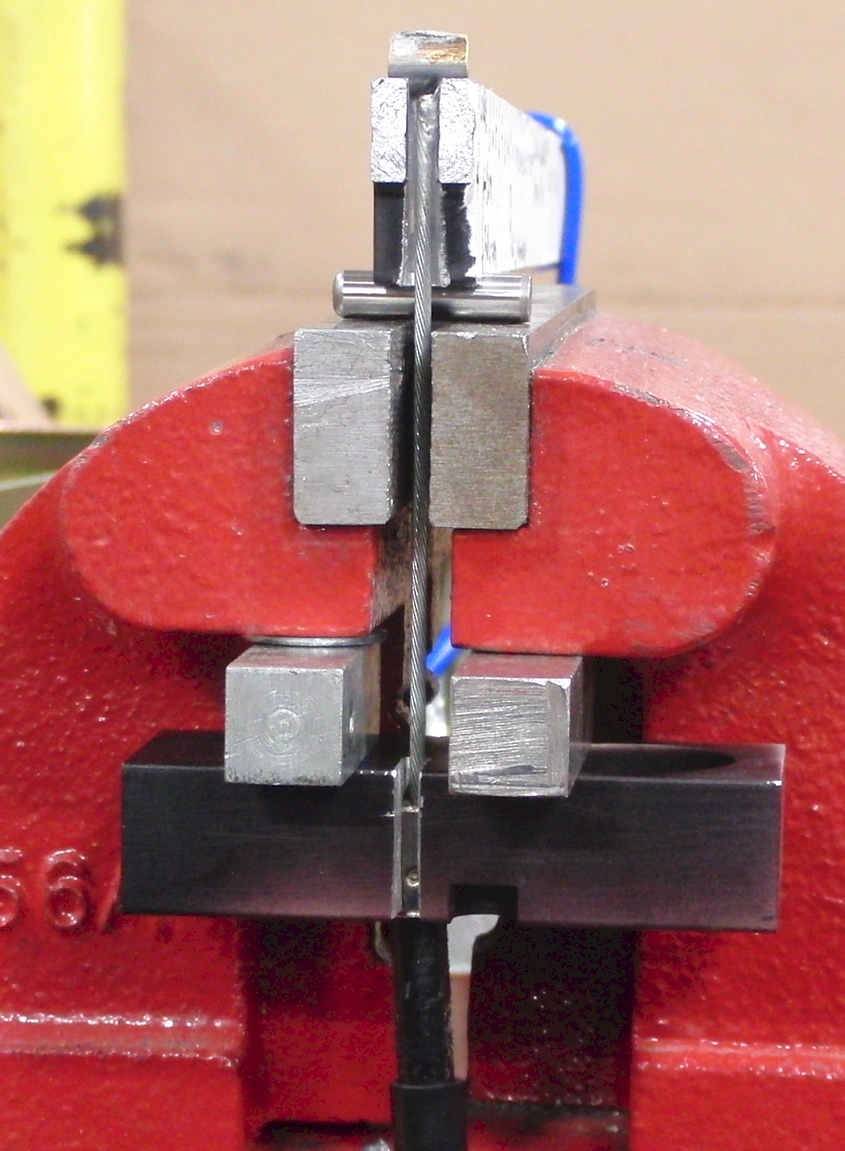
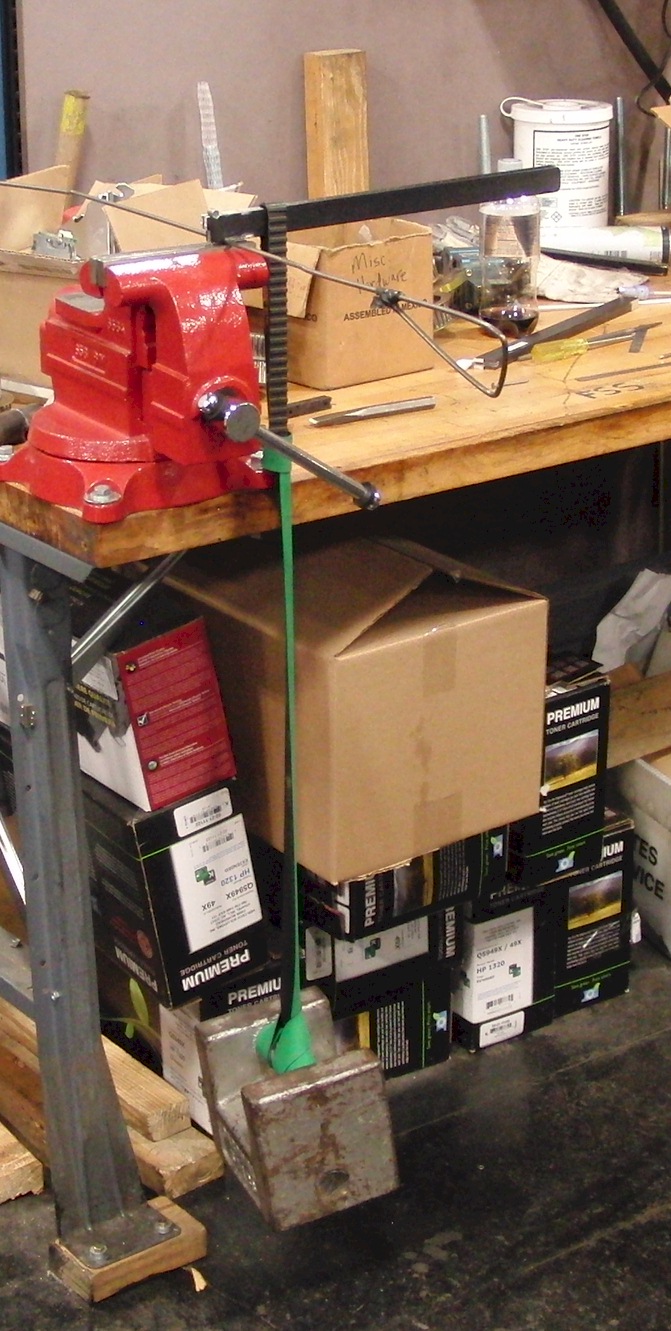
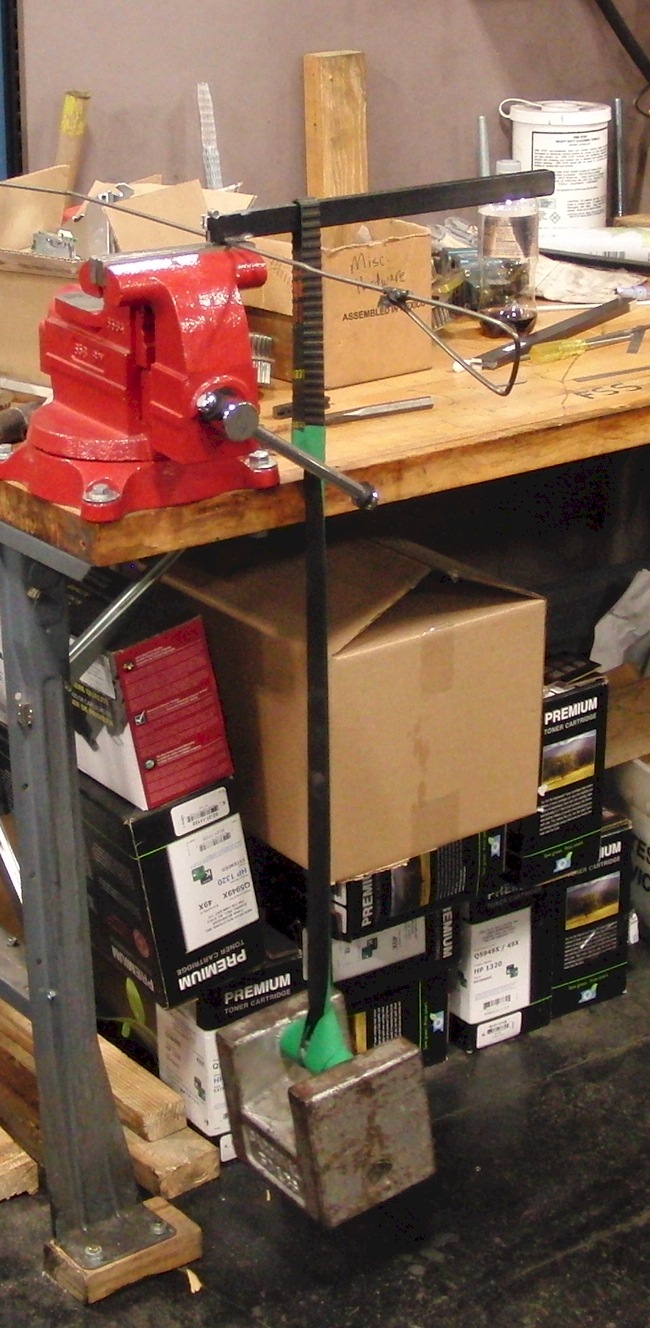
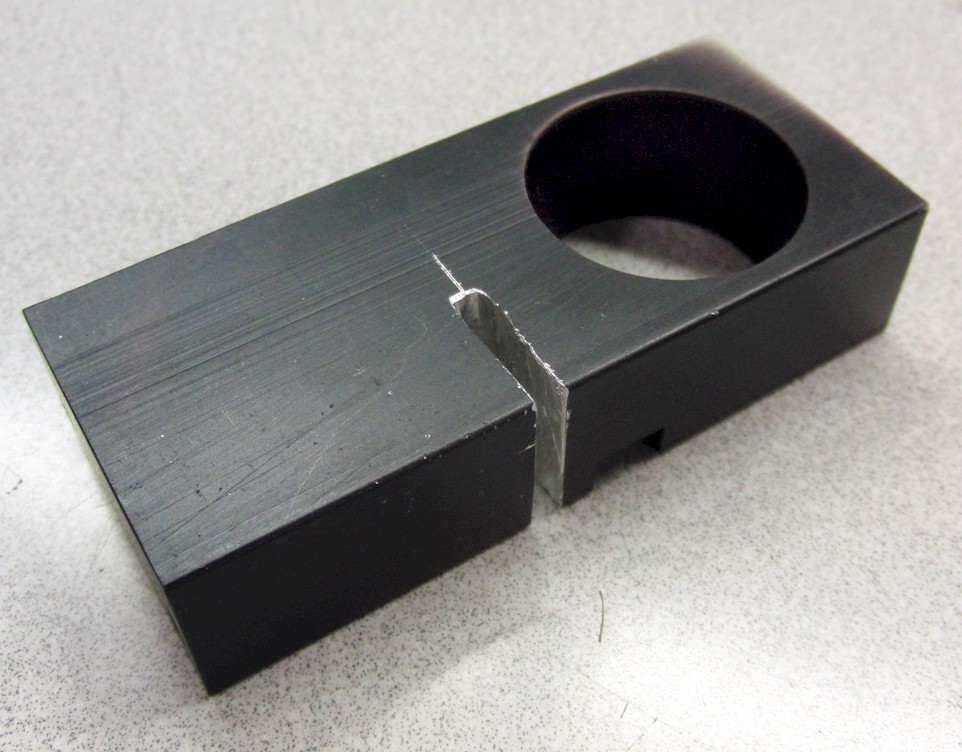
A test fixture was cobbled together to break the sample. The sample is held in a vise while a known weight is used on a long lever to apply a precise tension to the sample. Here is a closeup of how the sample is affixed in the vise, and the end of an aluminum bar. The long steel rod is being used as the fulcrum. (It did not need to be so long, but it is needed for other purposes, so was not cut down.)
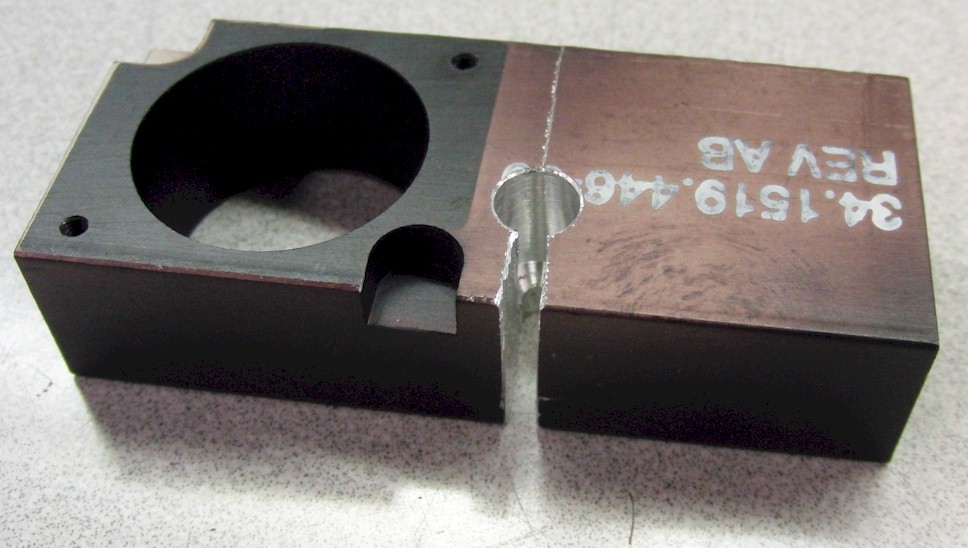
Here is a different angle showing the setup.
The lever was being pulled by a 50 lb weight hanging from some belting stock. The mechanical advantage was 5:1 producing 250 lbs of tension in the test sample.
Here is 10:1 producing 500 lbs tension.
Here is 15:1 producing 750 lbs tension.
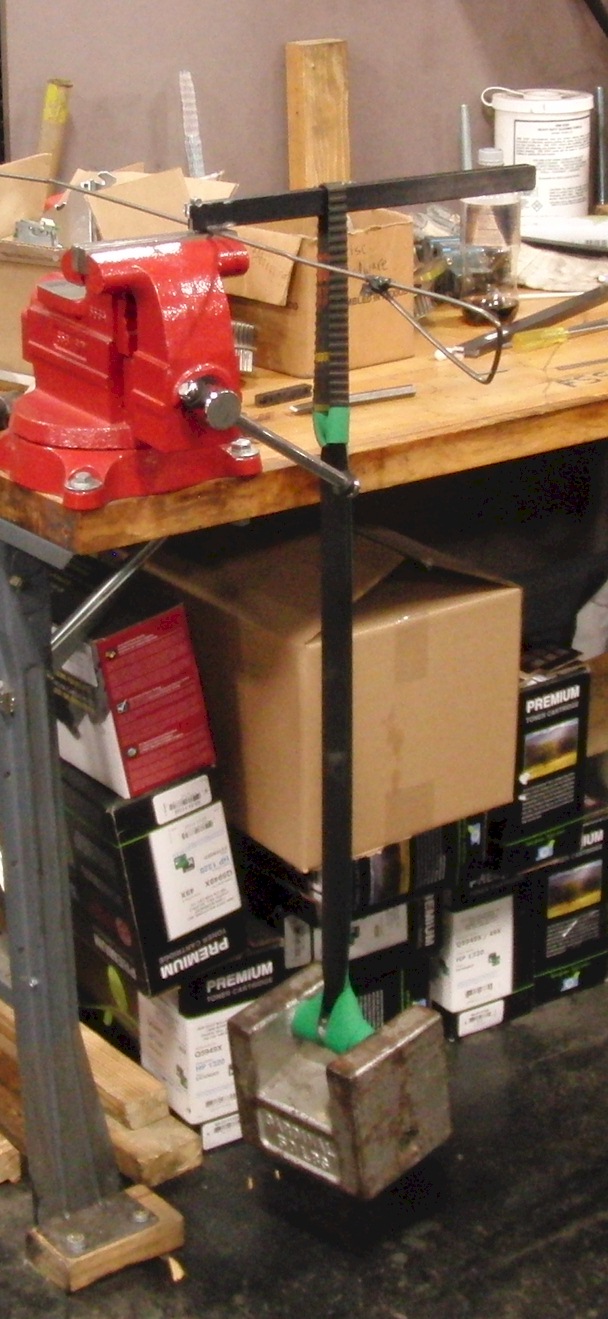
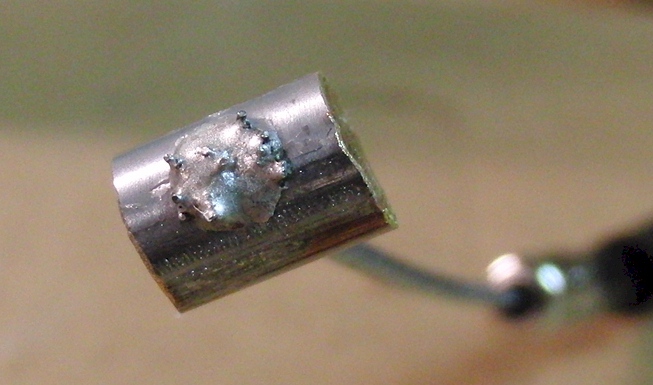
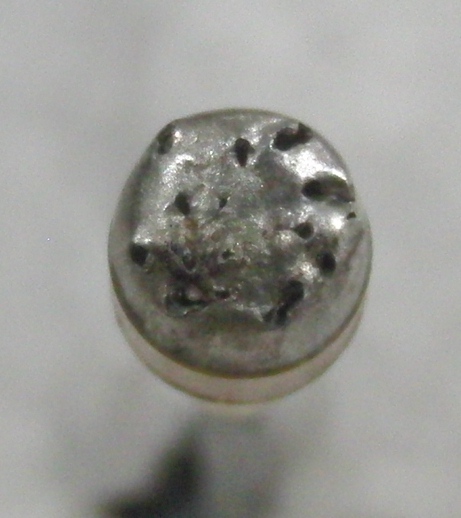
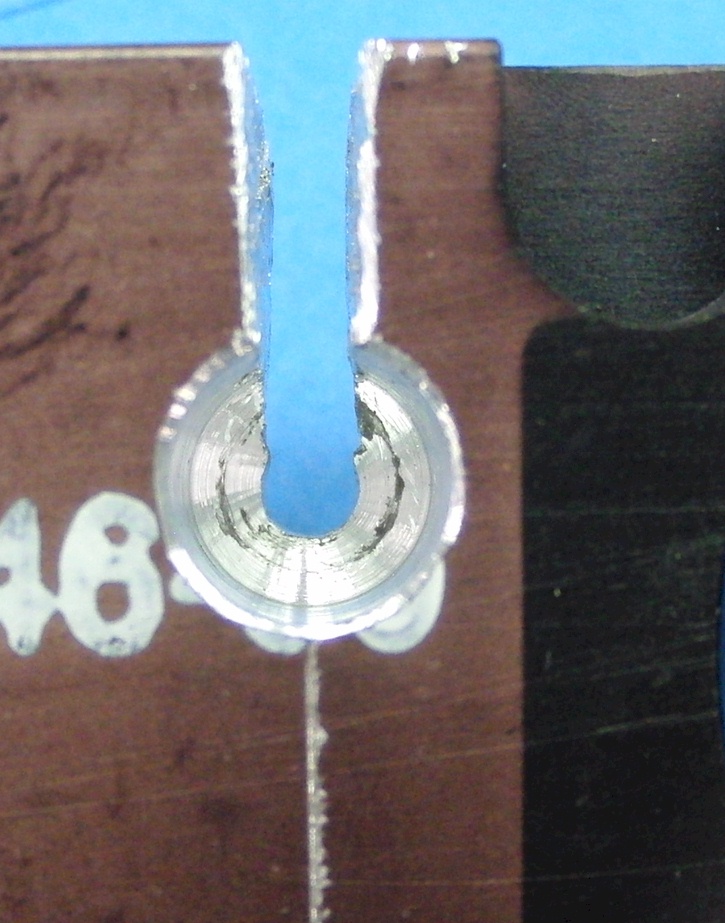
It failed at 850 lbs. The result was the cable slipped about 2mm out of the ferrule. You can see the amount the cable slipped out.


The wires no longer protrude out of the solder ball at the end of the ferrule as they slipped inside the ferrule.
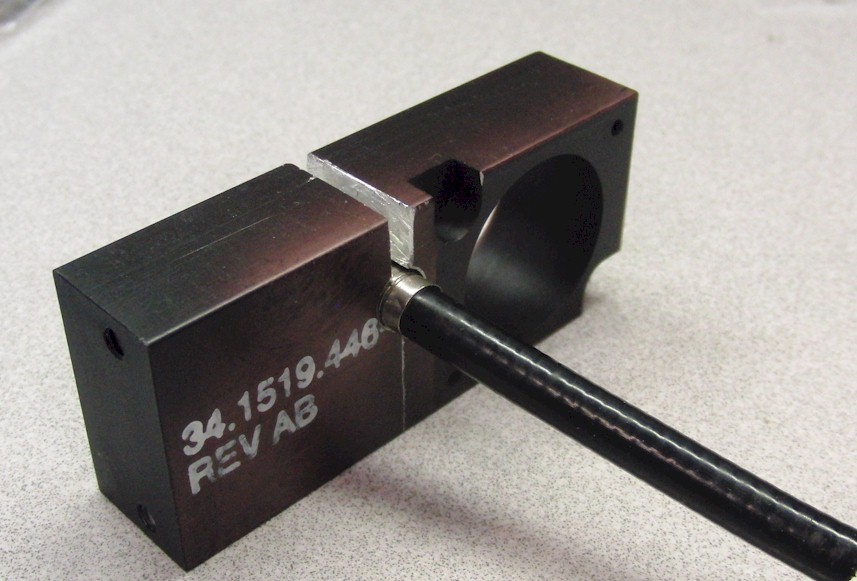
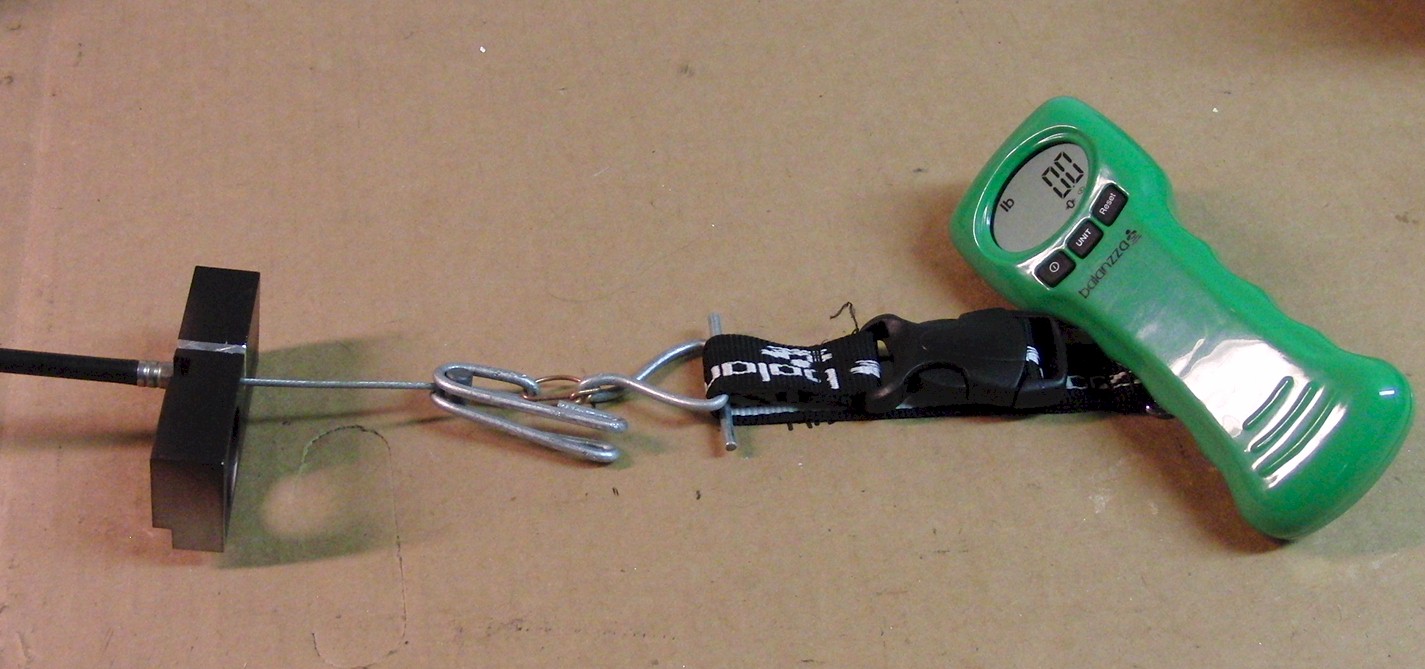
This photo shows the setup in place. (The tension reading in the photo is not the actual pull. It is just some random amount applied while taking the photo.)
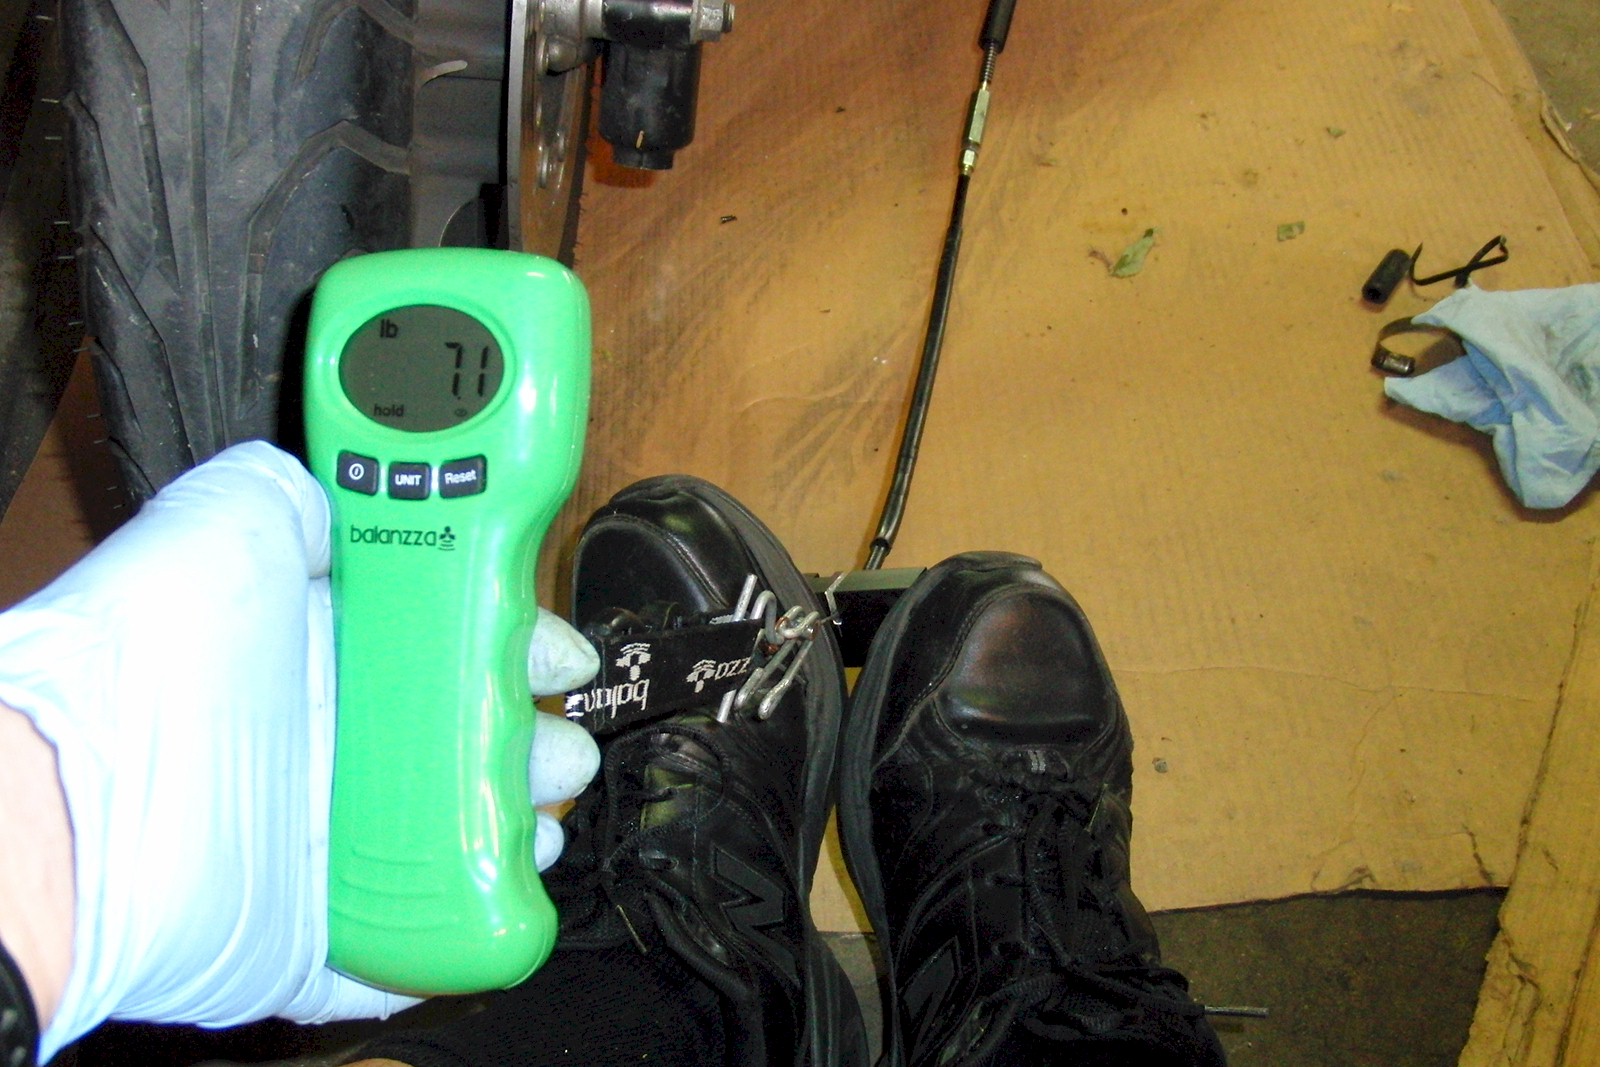
The actual cable tension, while activating the clutch, with the cable coming straight out of the housing, is approximately 47 lbs. This is on a clutch with slightly higher spring tension than stock.
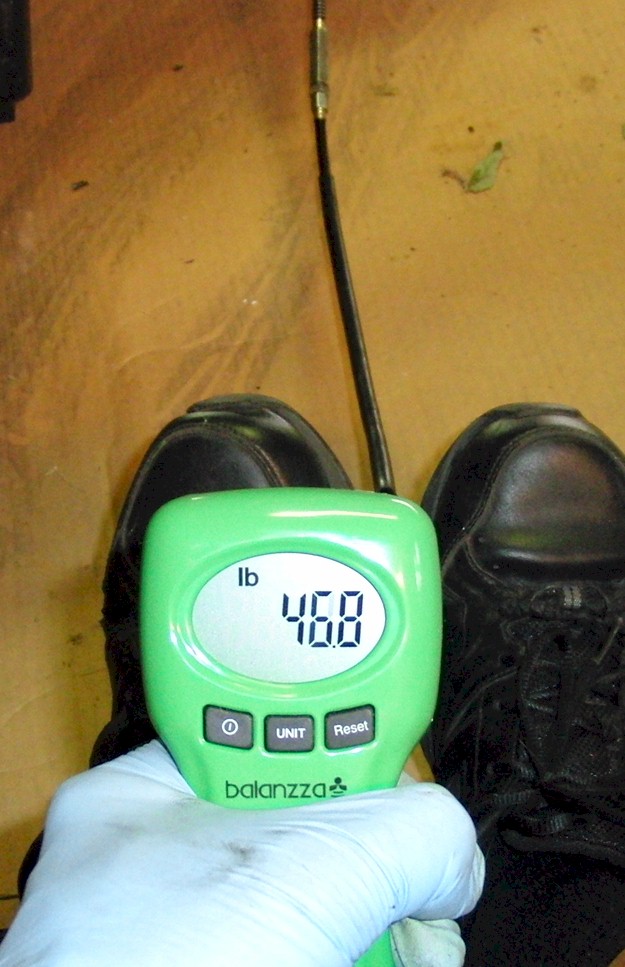
The 47 lbs was measured as a best-case scenario, that is, it is measured with almost no internal cable friction because the cable is mainly straight.
The lever tension measurements were taken at a spot on the lever approximately 4.25" from the pivot.
The mechanical advantage of the lever is about 4.25 / 1.125 = 3.78 .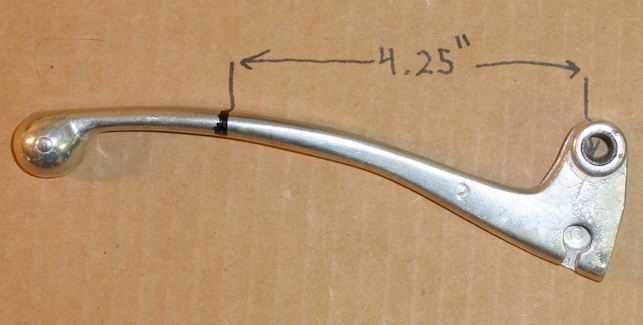
When the lever is being pulled, the peak measured tension was about 18 lbs. During release of the lever, from 100% to 50% of motion, the tension was steady at about 7 lbs. When pulling, the friction increases the required force on the lever. During release, the friction decreases the required force in order to maintain a steady release motion. This difference in tension is due to the friction in the cable (and other parts, to a lesser extent). The average of the two is about 12.5 lbs. That is the tension on the cable when the friction inside the cable is excluded. (Note that 12.5 * 3.78 = 47 lbs.) This would imply that the peak tension in the cable end, while pulling the lever, including friction, is about 18 * 3.78 = 68 lbs.